You probably know situations like this all too well: You install a theme or plugin and suddenly there are compatibility issues in your WordPress installation. In the worst case, your WordPress site can no longer be accessed, and you can no longer log in.
Now the only thing left to do is to create a backup - provided you create backups at regular intervals.
You can avoid such situations with a test environment, also called a "staging environment". Within such a staging environment (clone) you can test the installation of new themes, new plugins, or changes to the source code. Your changes will not affect your live site (production site).
In short, a staging environment is great for testing, and you can't break anything.
In this article
WP Staging – DB & File Duplicator & Migration
To be able to create a staging environment on WordPress, we recommend you the free WP STAGING - DB & File Duplicator & Migration. With this WordPress plugin, you can create a clone of your website - a staging site - within minutes.
You can install the plugin directly from the WordPress backend, and it does not require registration. WP Staging supports web servers like Apache, NGinx, and Microsoft IIS.
WP Staging plugin creates a clone of your website with just one click and sets up all subfolders on your server fully automatically. You don't have to worry about your website SEO, because your clone page doesn't contain any metadata and is not in the index.
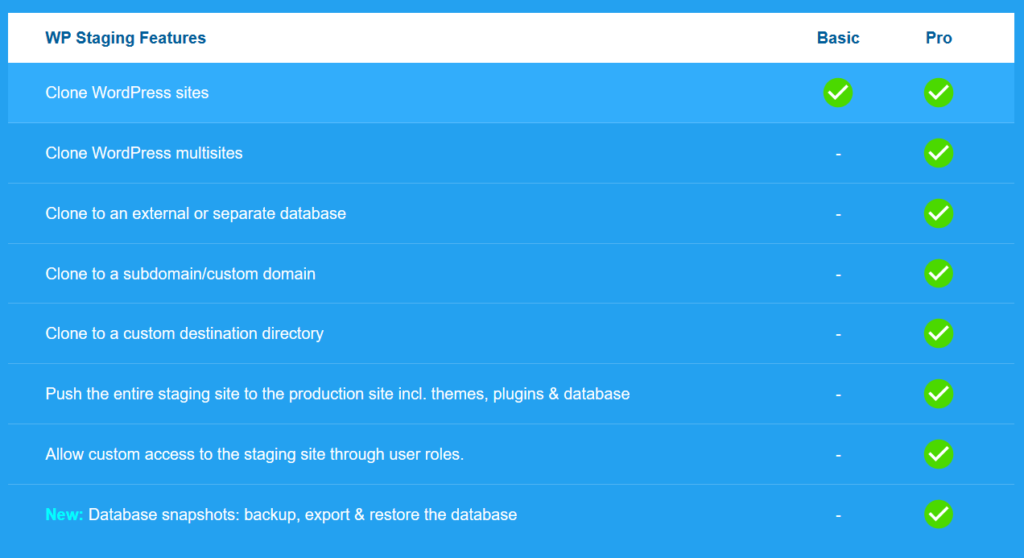
WP Staging is available in a Free version and a Pro version. The Free version is sufficient if you only want to create a staging site. In the Pro version, however, there are more features available, such as multisites, subdomains, or backups.
In 4 steps to the staging page
In the overview below, we'll show you how to create your own staging page using the WP Staging plugin for WordPress in just four easy steps.
Step 1: Install & activate WP Staging:
You can easily install the WP Staging plugin for WordPress directly from the WordPress backend. Enter the plugin name "WP STAGING - DB & File Duplicator & Migration" in the keyword search.
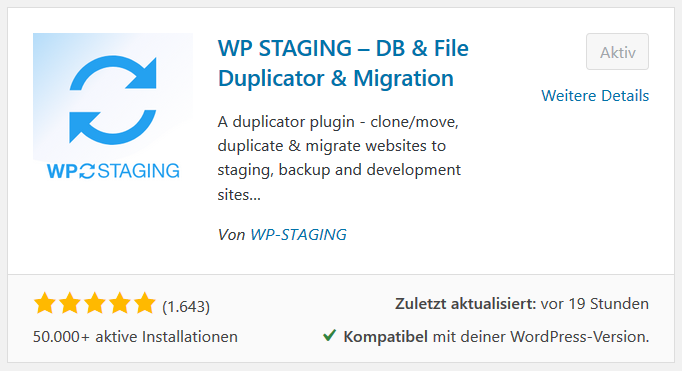
After the installation, you can activate and use the plugin directly via the "Activate" button.
Step 2: Initiate staging
WP Staging is simple and does not offer many options. One exception are various plugin settings, but as a normal user, you can leave them in the default configuration. This allows you to create a staging environment with just one click.
After activation, you will be taken directly to the "Pages / Start" menu.
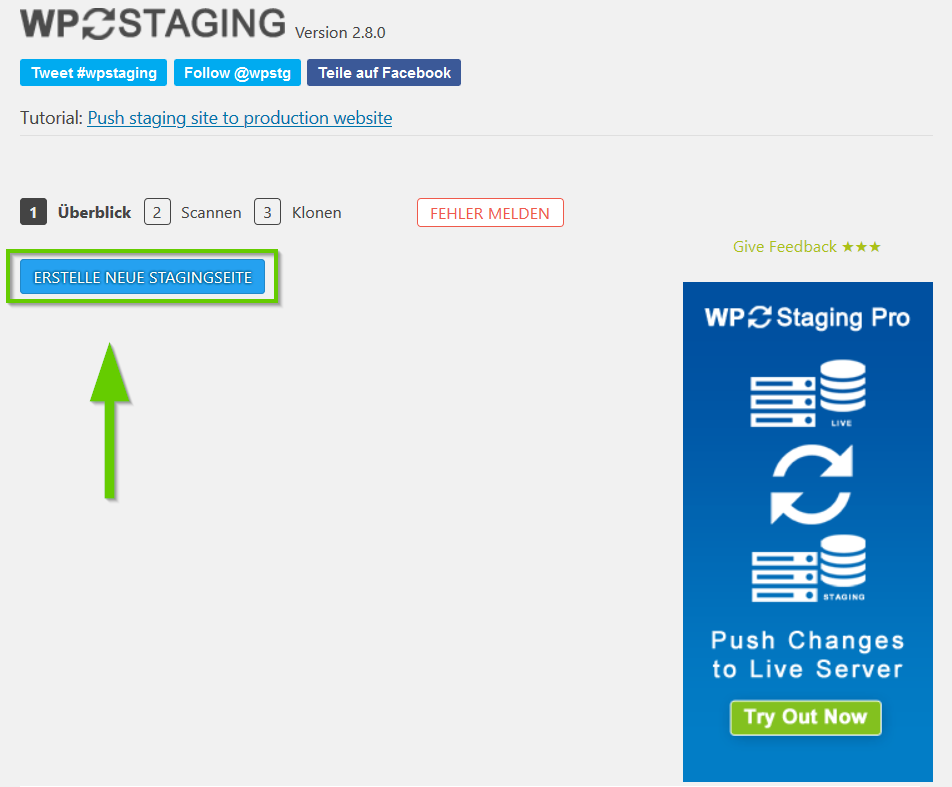
Here you will find the button "CREATE NEW STAGING PAGE". With a click on the button, the WP Staging Plugin for WordPress will scan your existing page in the next step.
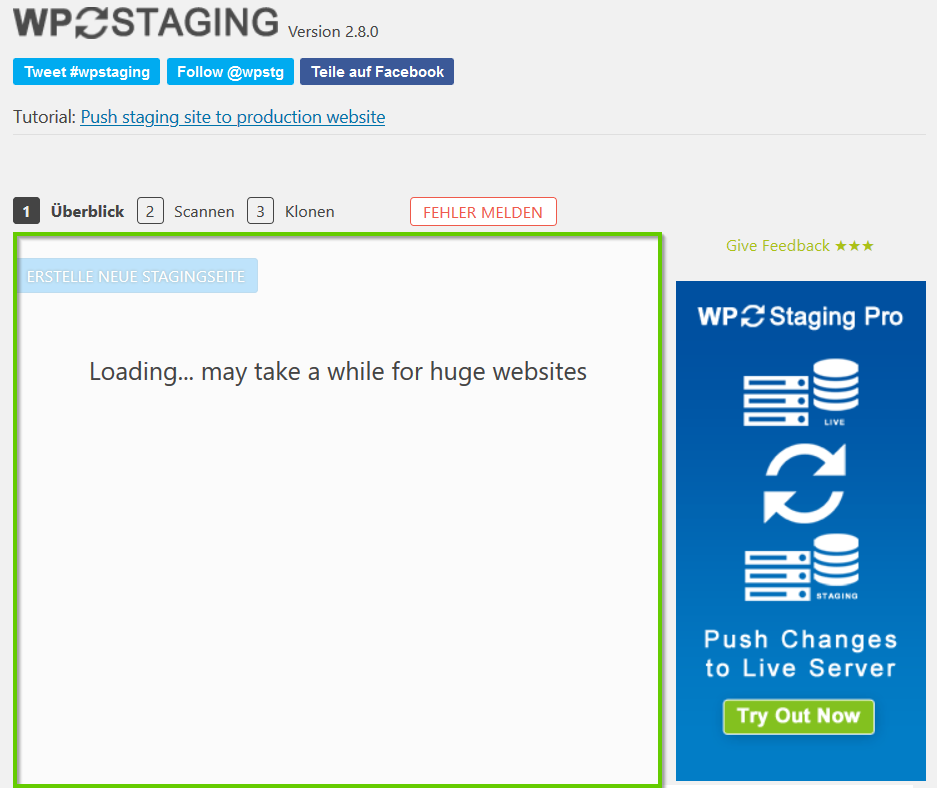
Step 3: Check scan / select data
Depending on the size of your website and the amount of data on your server, the scanning process may take several seconds.
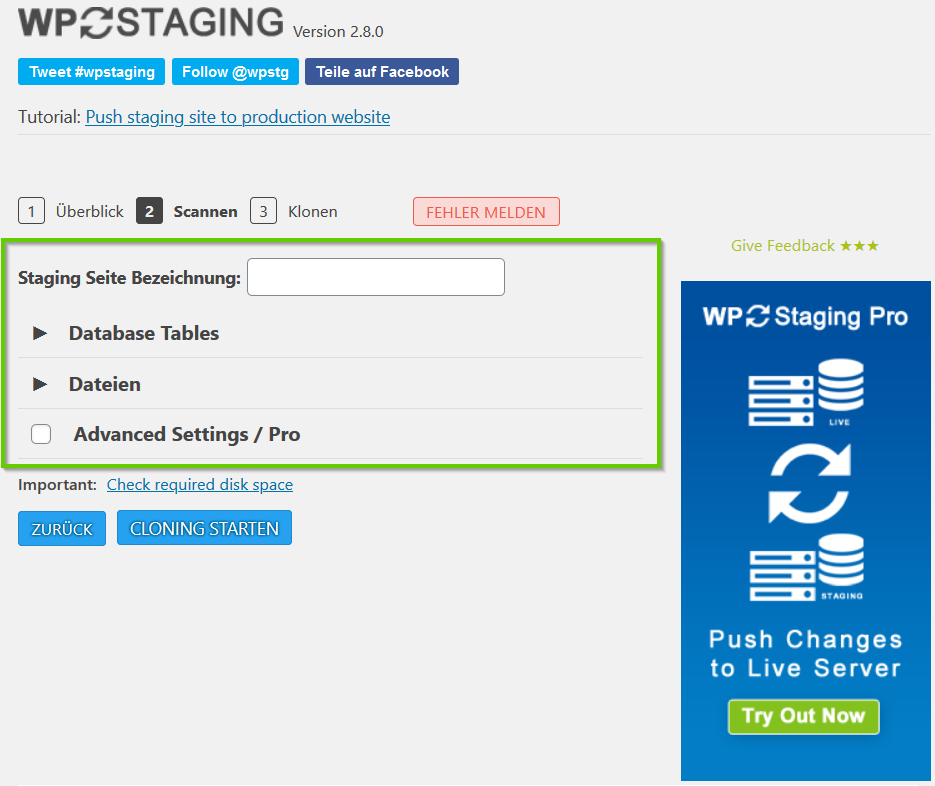
After the WP Staging plugin has completely scanned your website, you can designate the staging page. If needed, you can also deselect data within the "Database Tables" and under "Files".
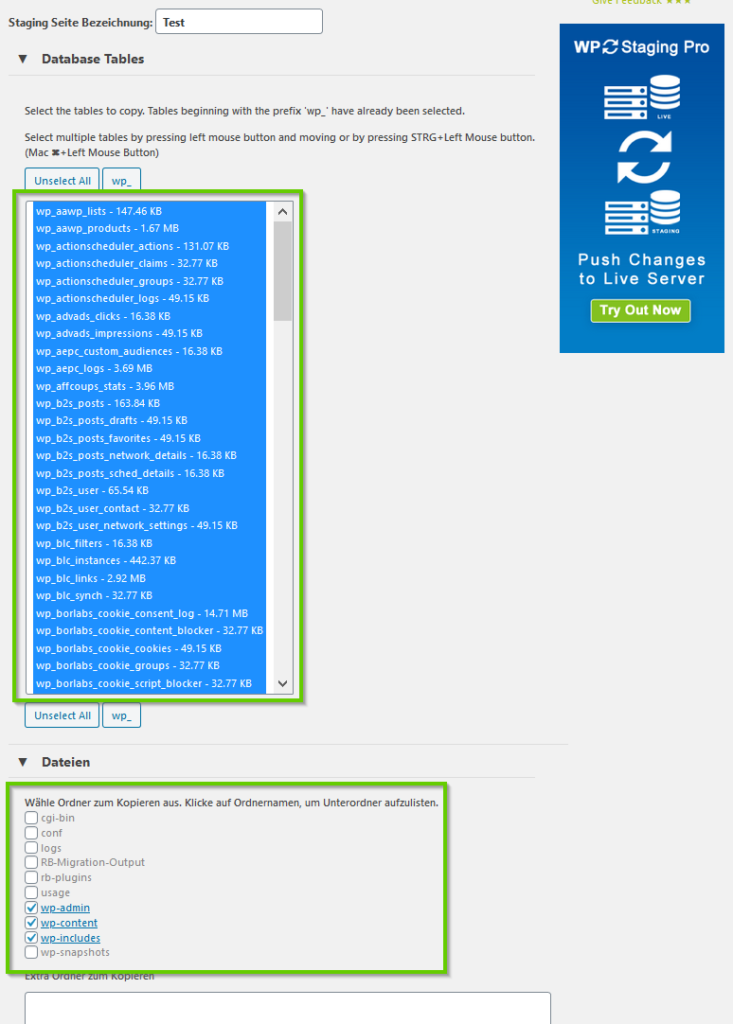
If you really want to clone your website 1 to 1, you should keep all settings like this, so that you can be sure that nothing is missing in your staging environment. This is especially important if you later want to transfer the clone from the staging environment back to the production environment, i.e. the live site.
For advanced and experienced users, however, this option still offers the possibility to exclude individual database tables or files.
Click the "START CLONING" button to start cloning and create the staging page.
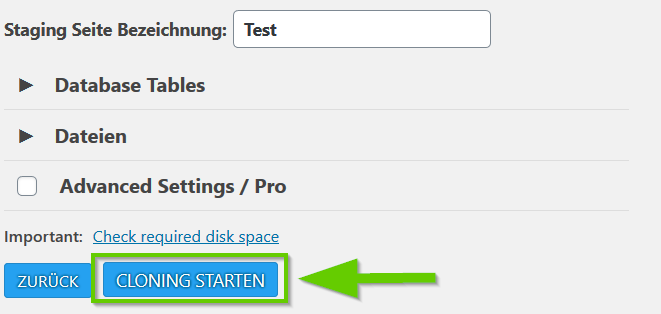
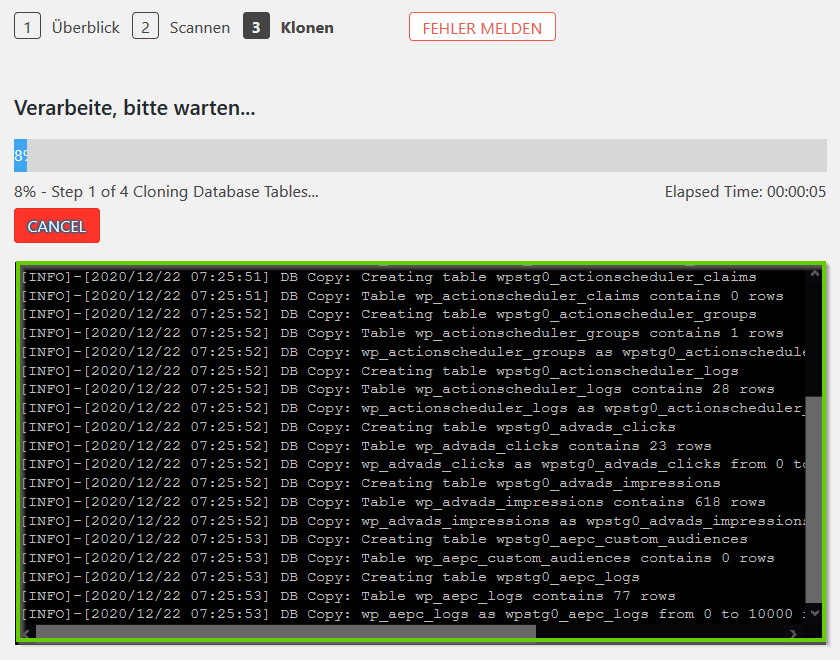
After that, the WP Staging plugin starts cloning all previously selected database tables and files. Again, the larger your website is, and the more data is on your server, the longer the cloning process can take.
Step 4: Open staging page & log in
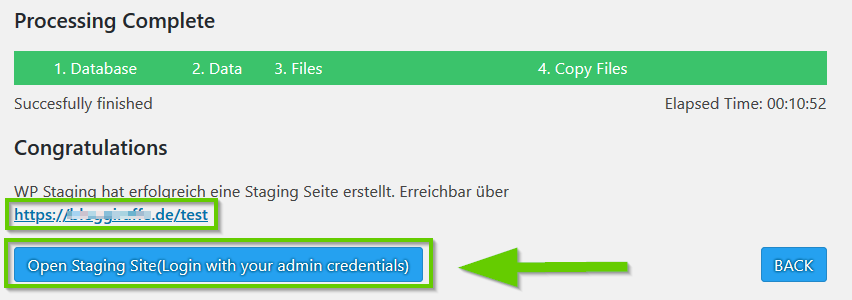
When the cloning of your website in the WP Staging Plugin is successfully completed, you can open your staging site by clicking the "Open Staging Site" button. Above the button, you will see the URL that will be used to access your staging environment. This is made up of your previous domain and the name you previously assigned to the staging site.
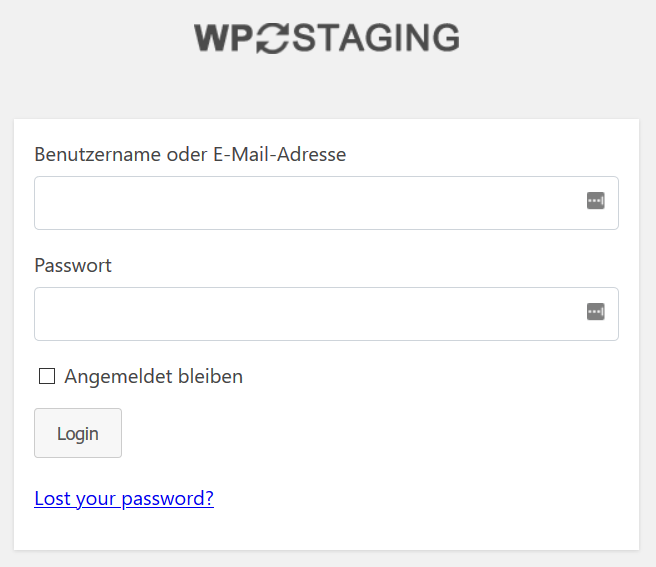
On the staging page you log in with your previous login data.
So that you can always see that you are inside the staging environment, the menu bar on WordPress is colored orange.

Within the staging environment, you can now install themes/plugins, make HTML / scripts / CSS adjustments, and much more. All changes you make are only within the staging page. So you can test everything and ensure full functionality.
With the Pro version of WP Staging for WordPress, you can also transfer changes that you have made on the staging page back to the live page (production page) at any time.
WP Staging: Advantages of the Pro version
The WordPress plugin WP Staging - DB & File Duplicator & Migration is available in a Free version and a Pro version. The Free version is sufficient for the creation of a pure staging site and tests completely
However, if you want to transfer changes from the staging site back to the live site, this is only possible in the Pro version of WP Staging. In addition, the Pro version of WP Staging offers many other advantages, such as the use or cloning of multisites, subdomains, or even external databases.
Particularly noteworthy here is the Backup & Migration feature in the Pro version. So if you use WP Staging, you don't need an additional tool for more backups of your WordPress site as well as their restoration.
Backup & Migration
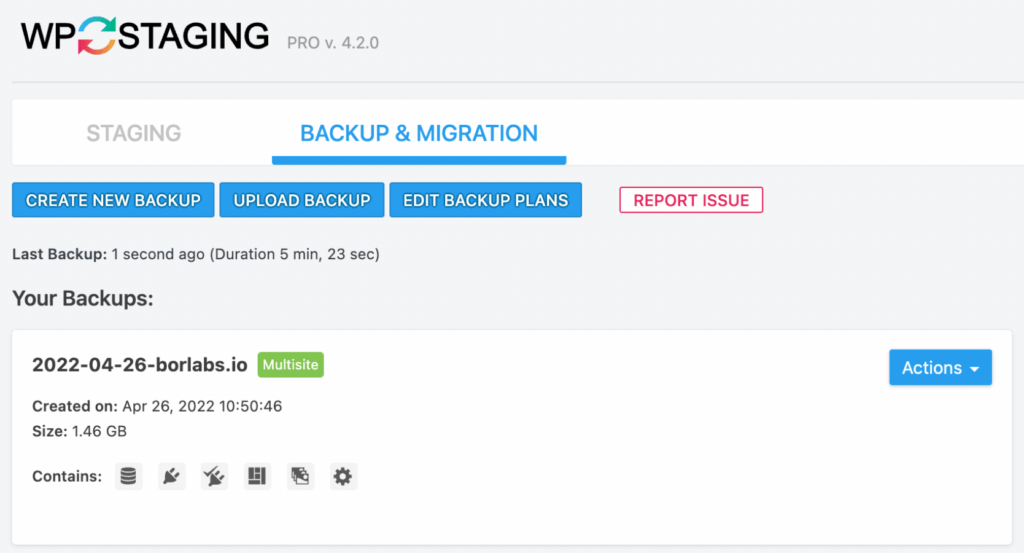
WP Staging offers as already mentioned a full backup & migration function. This means that you can schedule / create backups for your WordPress site with the help of the plugin, as well as restore them easily if necessary.
Backup Settings
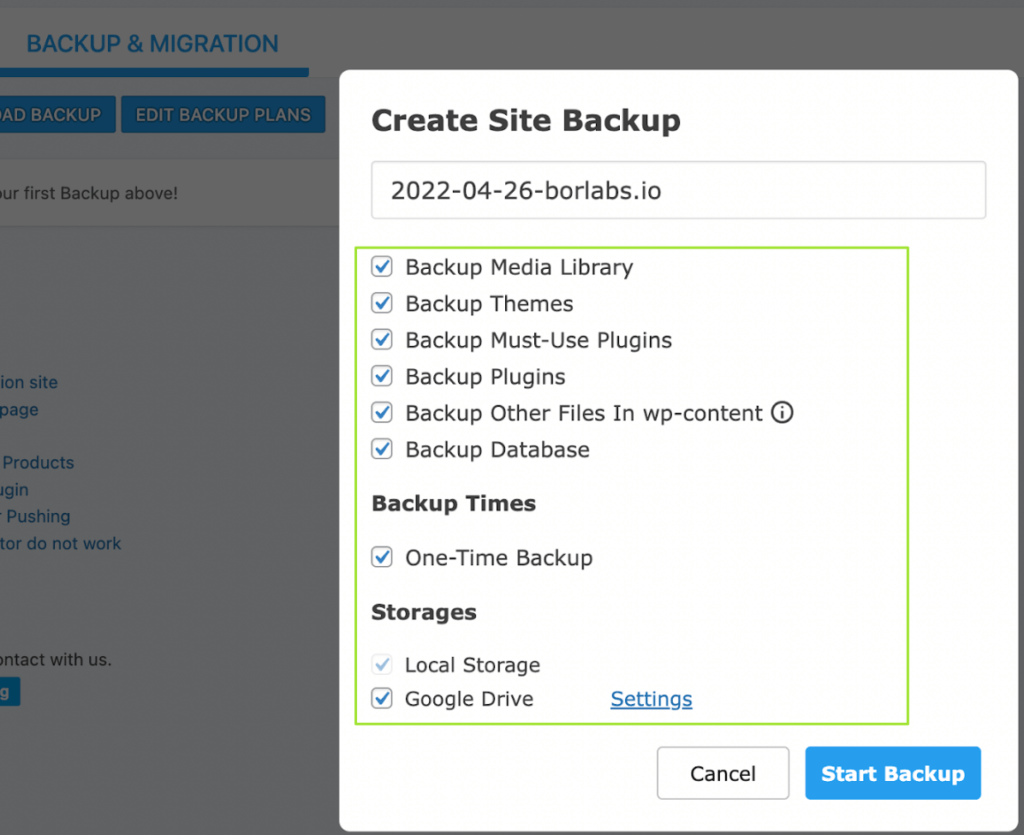
Before you perform or plan a backup with WP Staging, you can choose which data should be included in your backup. So you decide if you want a full backup or if you only want to back up specific data like themes, plugins, and databases.
You can also decide where the backup should be stored. Currently, you can choose between local storage or storage in Google Drive.
One-click backup / backup schedule
With the help of the One-Click Backup feature you have the possibility to create a backup for your WordPress site with just one click.
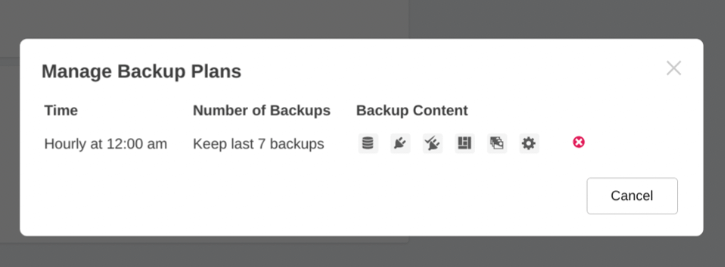
However, if you want backups to be performed automatically or on a regular basis without you having to take care of them, you can also schedule backups and set appropriate intervals (daily, every 7 days, etc.).
Prices & Licenses
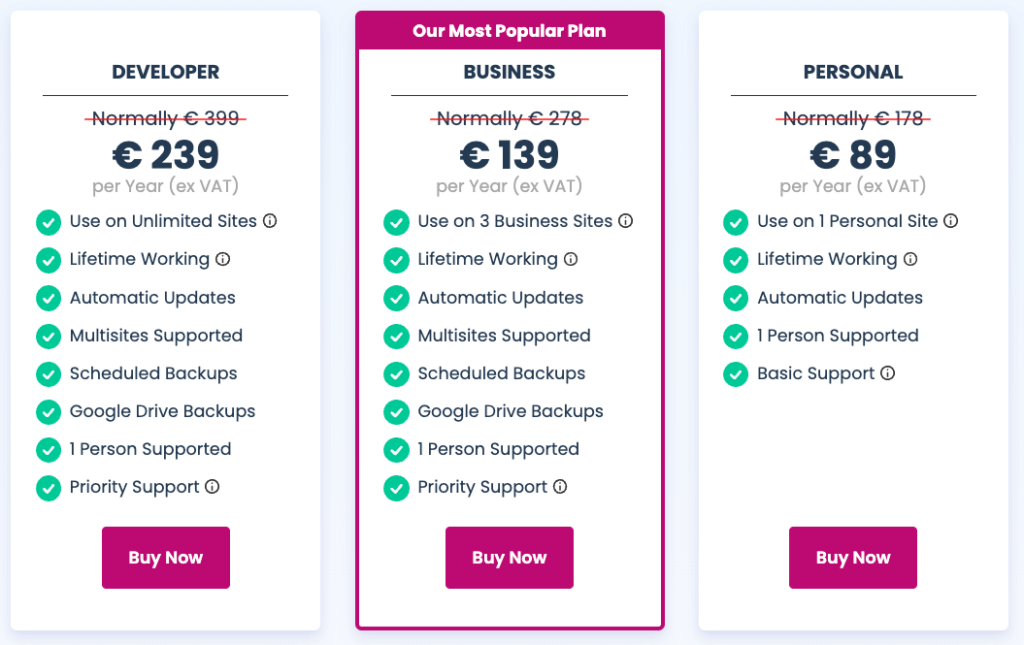
WP Staging for WordPress is available in its Pro version in a total of three different licenses (Developer, Business, Personal). The licenses differ in terms of features and the number of usable pages on which the plugin can be installed and used. In addition, you benefit from priority support with the licenses Developer and Business.
Conclusion: WP Staging Plugin for WordPress
WP Staging for WordPress is a simple tool that is limited to the essential functions of a test environment. Even as a beginner, it is possible to create a test environment of your WordPress site within a few minutes.
If you need more features, grab the Pro version and get a number of other useful features, in addition to an easy way to apply the staging page changes to the live page. This makes WP Staging a convincing overall package for anyone who needs a test environment.
WP Staging Pro

You don't have WP Staging Pro yet? You can buy WP Staging Pro here1
1Affiliate Link
