Step 1 - Create Script Blocker
In the Borlabs Cookie menu, click Script Blocker and then Add New.
Set page and search phrase
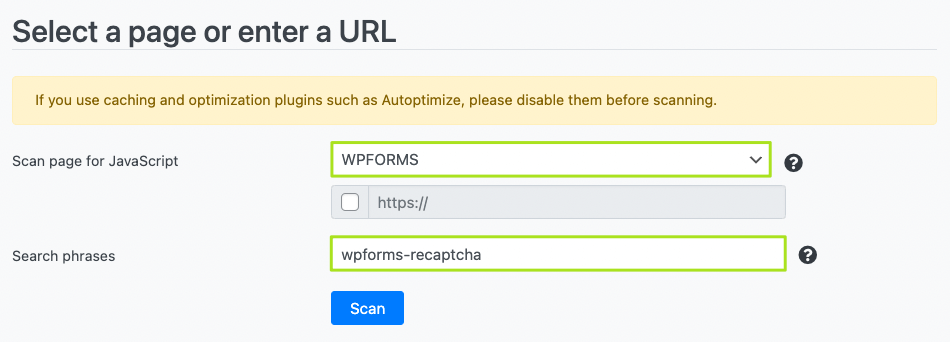
Now you have to select the page where the form is embedded. In our example, this is the WPForms page. Enter the word wpforms-recaptcha in Search phrases. This will ensure that only the URLs we are looking for are found. Then click on Scan.
Configure Script Blocker and block JavaScript handles
After your page has been scanned, and you have clicked Next, you need to set an ID and name for your script blocker. For ID you enter recaptcha and for name Google reCAPTCHA. Set the status to ON.
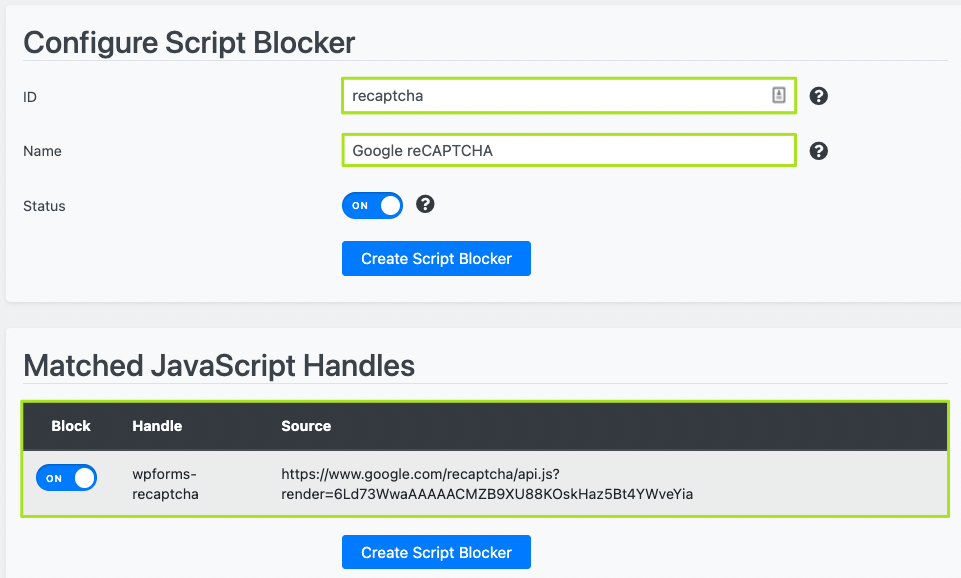
Now you have to select the appropriate JavaScript handles that should be blocked by the Script Blocker. Now you can create the Script Blocker.
Copy code for Content Blocker
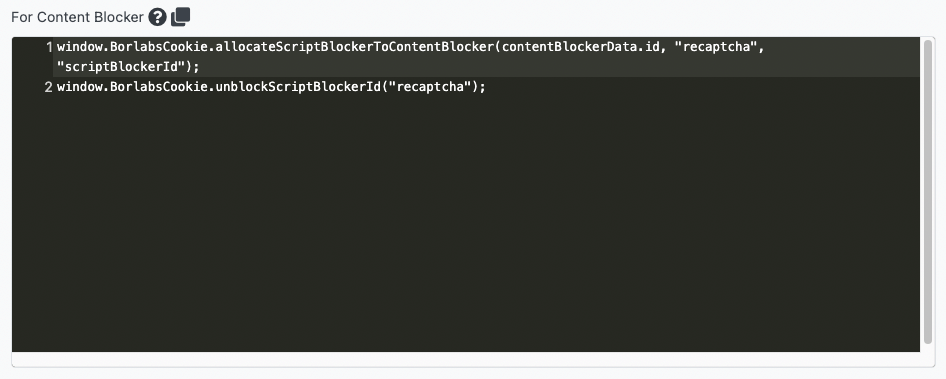
After the Script Blocker is created, you have to copy the code for the Content Blocker to the clipboard. We will need it in a moment to set up a working content blocker in the second step.
Step 2 - Create Content Blocker
Now create the Content Blocker. In Borlabs Cookie, click Content Blocker and Add New.
Content Blocker konfigurieren
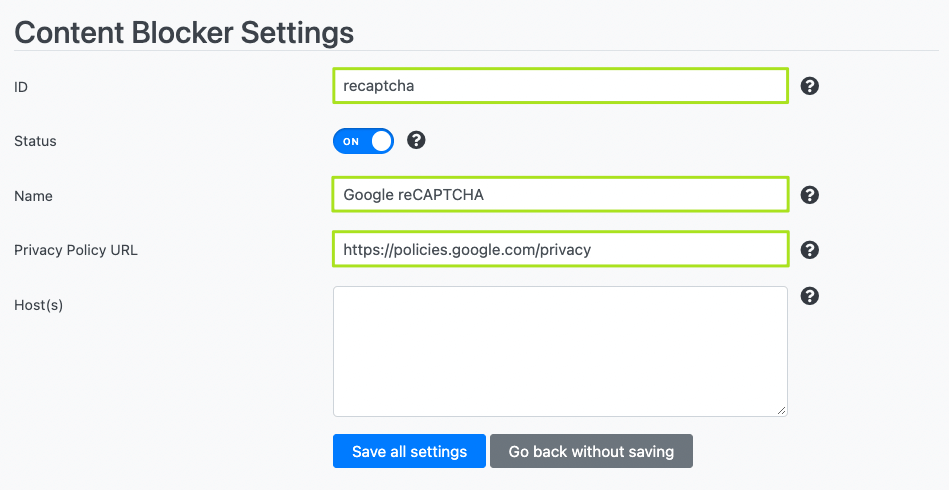
Now you have to configure the Content Blocker. Enter Google reCAPTCHA as the name as in the image and add the following URL as the privacy policy: https://policies.google.com/privacy
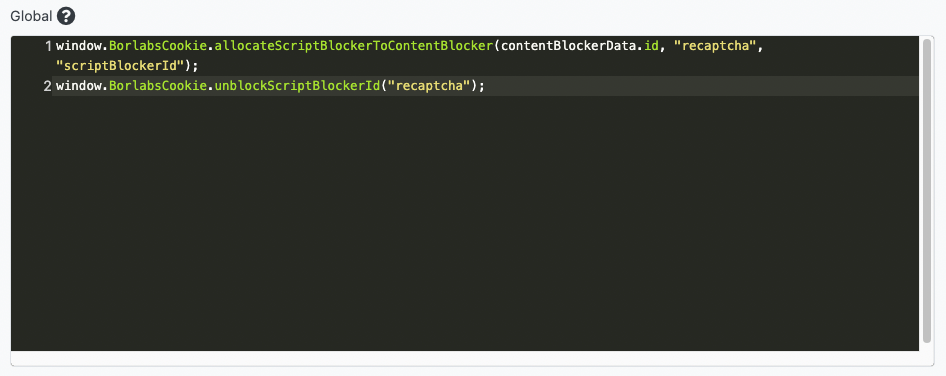
Now go to the JavaScript section and in the Global field paste the Content Blocker code you previously copied to the clipboard in Script Blocker. Set the Execute Global Code First option to ON.
Step 3 - Extend page with contact form
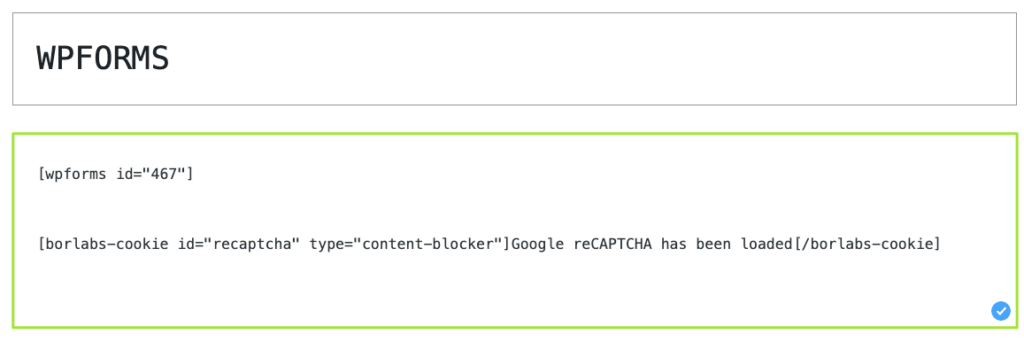
Go to the page where the contact form is embedded and paste the Content Blocker shortcode below the shortcode for the contact form.
Replace …block this… with Google reCAPTCHA has been loaded. The form can now be submitted once the button has been pressed.
