In the following documentation, we explain how you can use Mailchimp in WordPress in compliance with the GDPR with and without a plugin.
Mailchimp without plugin
If you want to insert Mailchimp via an embedded form, simply copy the HTML code provided by Mailchimp and paste it into WordPress using the code editor.
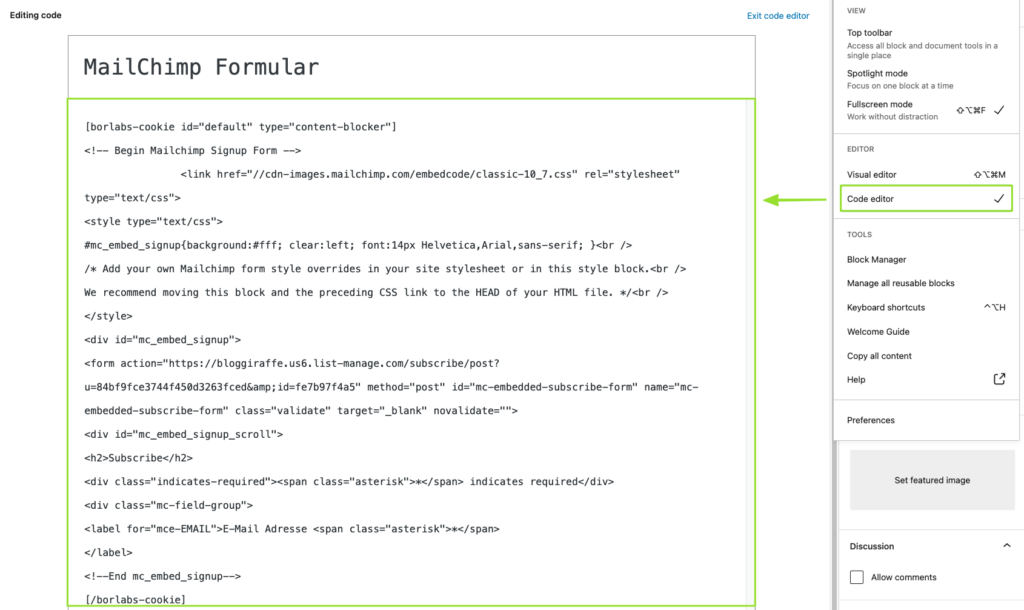
Now copy the shortcode from the "Default" Content Blocker over the corresponding icon.

Place this around the embedded code of MailChimp.
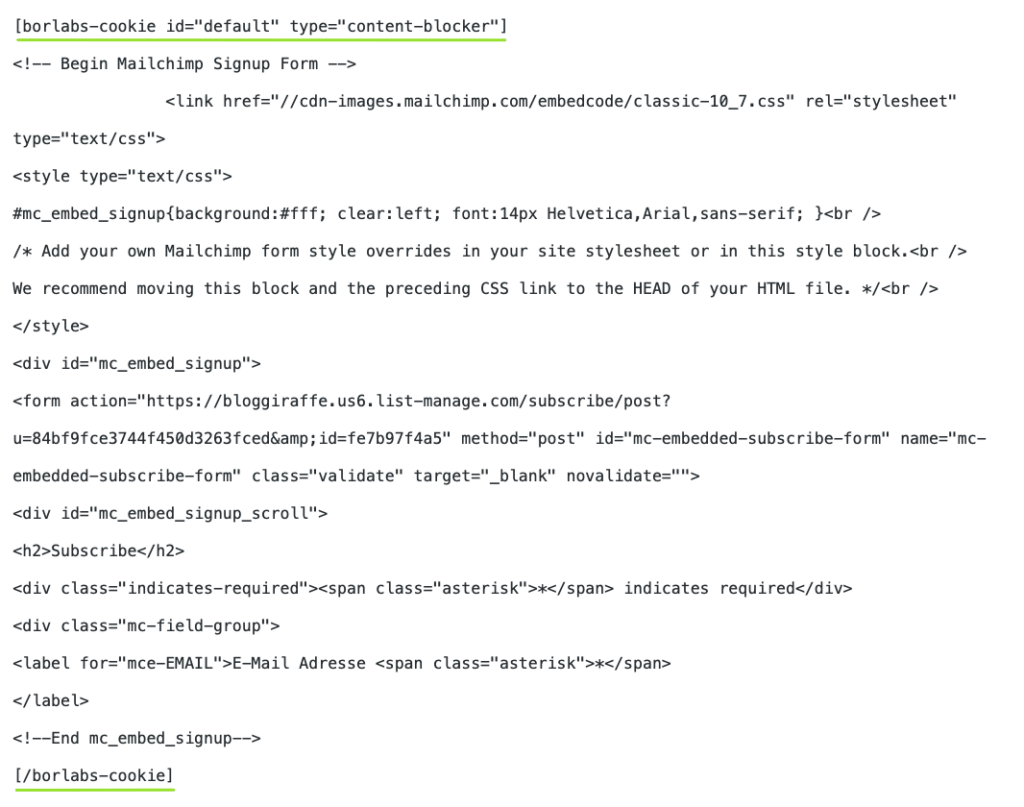
The result looks like this:

Mailchimp with plugin
If you want to integrate Mailchimp via a plugin, this is possible with a plugin such as the popular "Mailchimp for WP": https://wordpress.org/plugins/mailchimp-for-wp/
In order for the plugin or its forms not to establish a connection to Mailchimp without consent, you must block the corresponding script with our Script Blocker.
In the following, we will show you which steps are necessary for this.
Step 1 - Create Script Blocker
In the menu item "Script Blocker", click on the button Add New.

Set page and search phrase
In the following view, you must select the page in which you have integrated the form. Enter mc4wp-forms-api under search phrases. Then click on the Scan button.
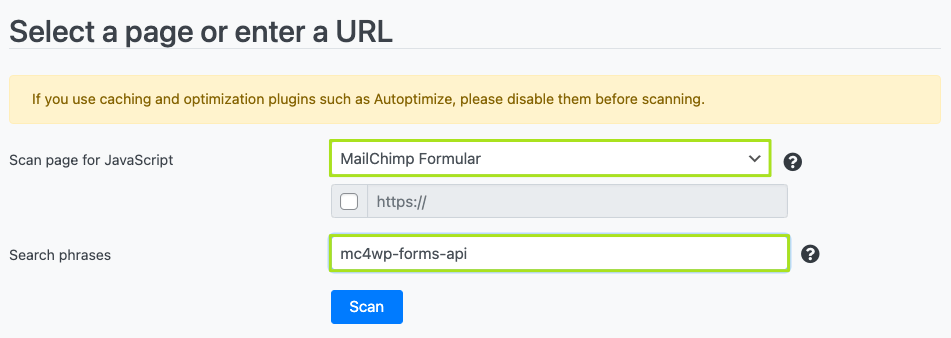
After the scan is complete, click the Next button.

Configure Script Blocker and block JavaScript handles
Now you have to configure the script blocker. To do this, enter mailchimp under ID and Mailchimp under Name. Also set the status to ON.
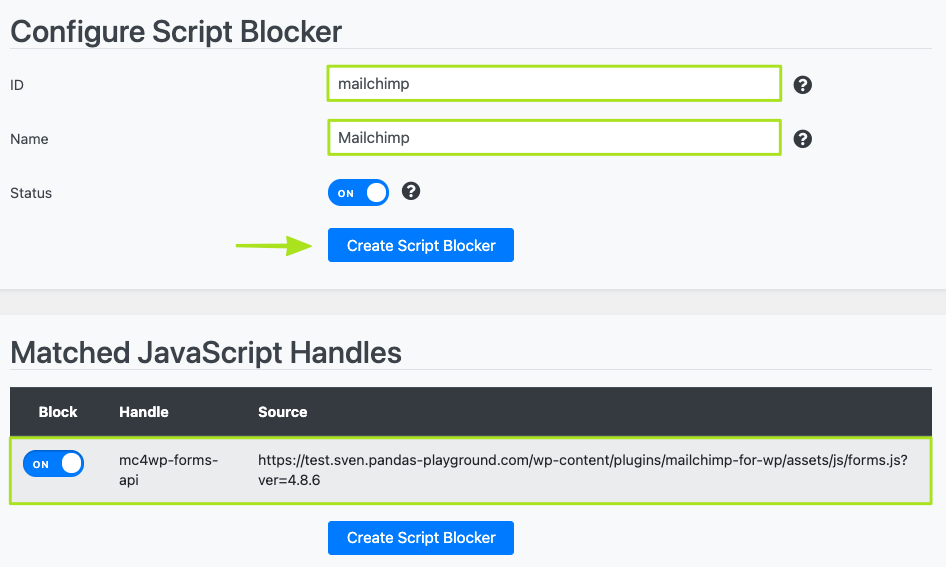
Then click on the button "Create Script Blocker".
Copy code for Content Blocker
After the Script Blocker has been created, you must now copy the code for the Content Blocker to the clipboard. We will need this in a moment to set up a functioning content blocker in the second step.
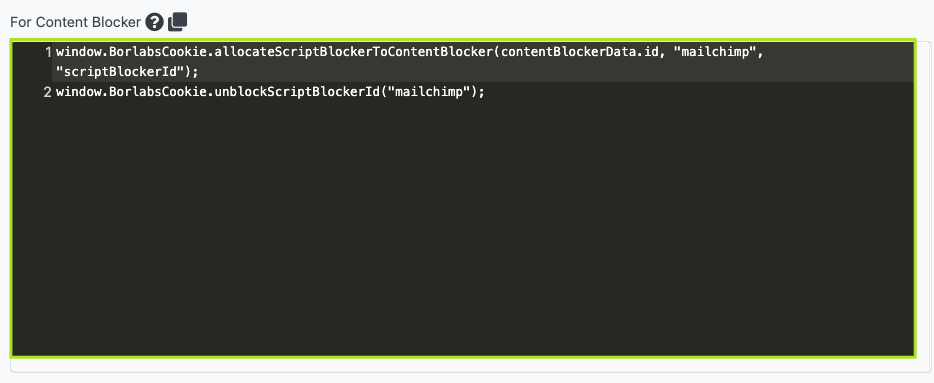
Step 2 - Create "Mailchimp" Content Blocker
Click on the button "Add new" in the menu item "Content Blocker".

Content Blocker Settings & Configure
In the Content Blocker settings, enter an ID, a name, a link to the privacy policy and a host.
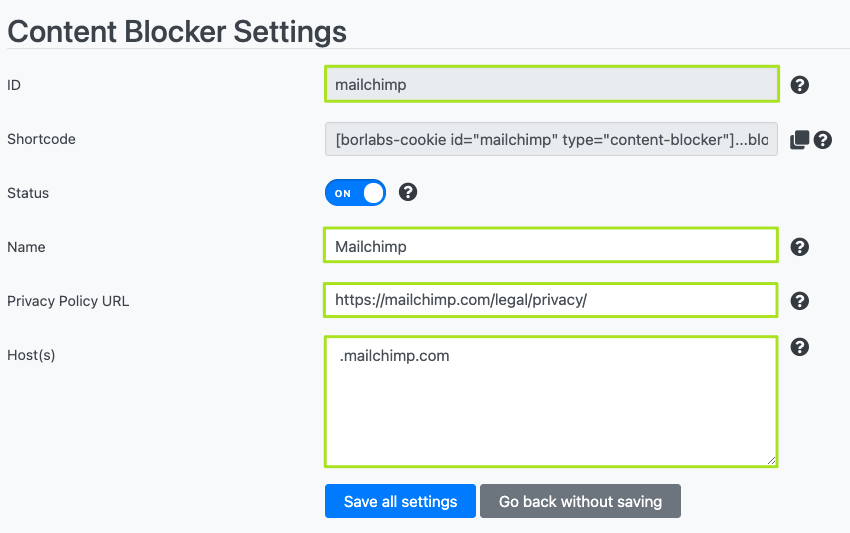
- ID: mailchimp
- Name: Mailchimp
- Privacy Policy URL: https://mailchimp.com/legal/privacy/
- Host(s): .mailchimp.com
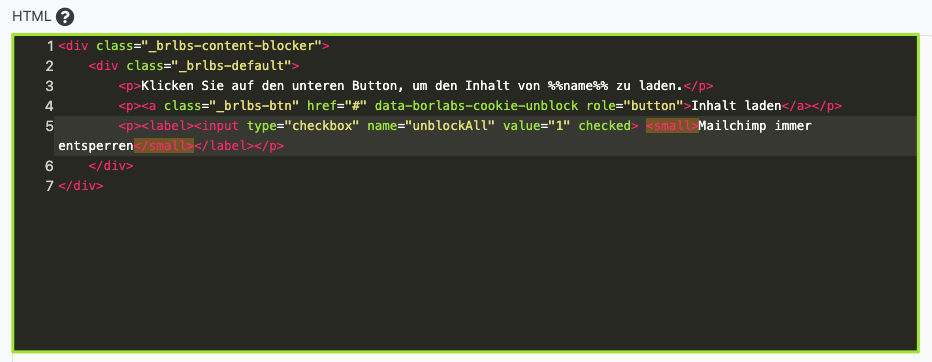
Add the following HTML code under "Preview Blocked Content" → "HTML":
<p><label><input type="checkbox" name="unblockAll" value="1" checked> <small>Always unblock Mailchimp</small></label></p>
    </div>
The result should then look like this:
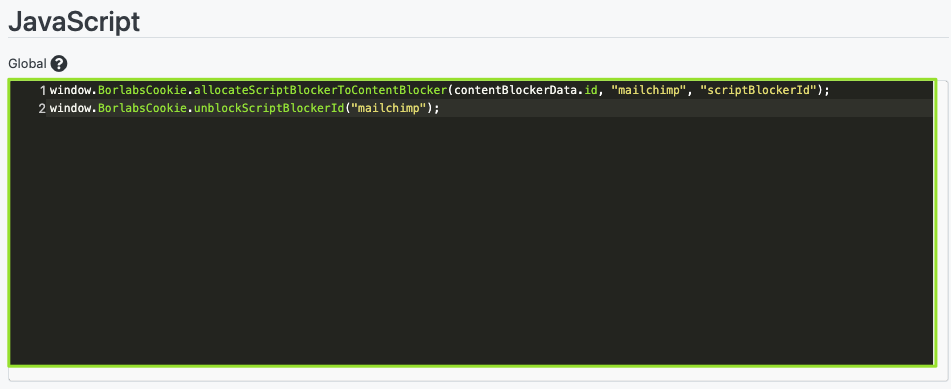
Under the item "JavaScript" → "Global" store the previously copied Content Blocker Script.
Then click on the button "Save all settings".
Step 3 - Block Mailchimp for WP forms
In order for the Mailchimp for WP forms to be blocked correctly, you must use the Content Blocker shortcode. You can find this under "Content Blocker Settings" → "Shortcode".

To do this, simply copy the shortcode over the corresponding symbol.
Now put the content blocker shortcode you just copied around the Mailchimp for WP shortcode so that our content blocker can take effect here.

The result is as follows:
