In this article, we'll show you how you can use Borlabs Cookie to obtain consent for your tags in Google Tag Manager to execute only those tags for which consent has been given.
Step 1: Set up Google Tag Manager
Click on Cookies in Borlabs Cookie and then on Add New in the Essential Cookie Group.

In Services, select Google Tag Manager and click Next.
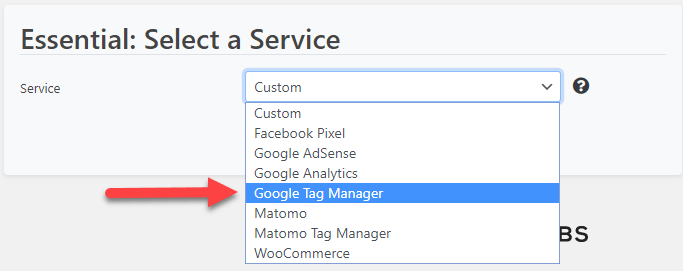
Borlabs Cookie fills in all necessary data. Scroll down to Additional Settings and enter your GTM ID. Also enable "Prioritize" and "Cookie before consent".

Step 2: Add Cookie
We need to create a cookie in Borlabs Cookie for all tags from the Google Tag Manager for which we need consent. This cookie is only used to transfer the status of consent to the Google Tag Manager. In this example, we use the tag for Google Analytics.
Set up Google Analytics
Click on Cookies in Borlabs Cookie and then on Add New in the Cookie Group Statistics.

Under Services, select Google Analytics and click Next.
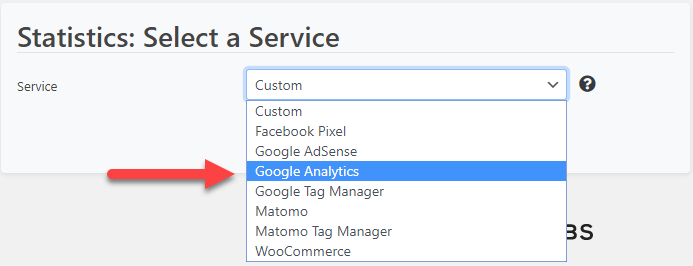
Borlabs Cookie fills in all necessary data. Scroll down to Additional Settings and enter something in the Tracking ID field. This field is mandatory, but we don't need it.
Under Opt-in Code insert the following code:
<script>
window.dataLayer = window.dataLayer || [];
  window.dataLayer.push({
    event: 'borlabsCookieOptInGoogleAnalytics',
  });
</script>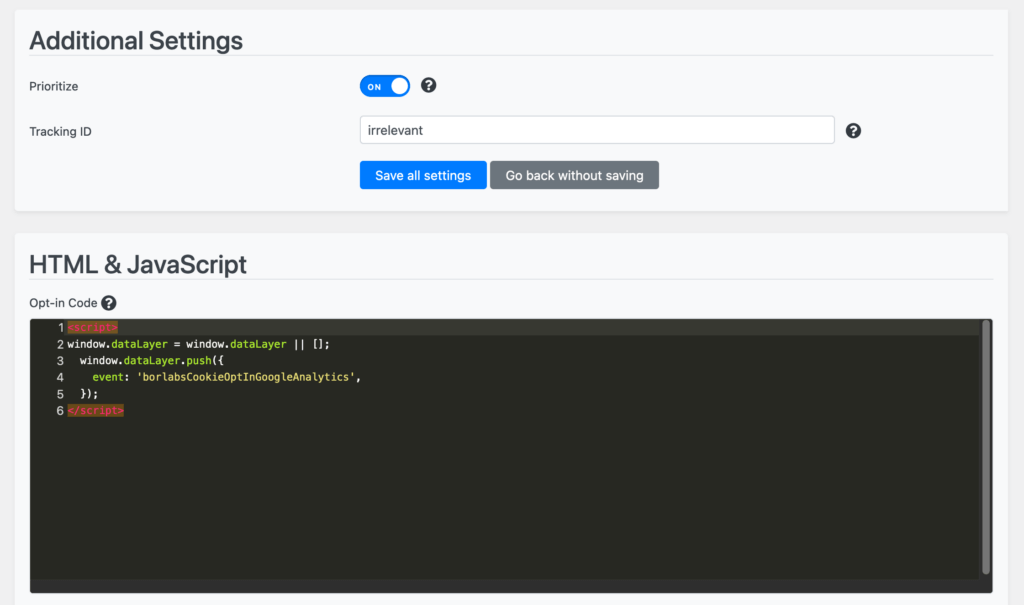
If the visitor agrees to the use of Google Analytics, the event borlabsCookieOptInGoogleAnalytics is sent to the Google Tag Manager. We will use this event later for our trigger that will initiate the Google Analytics tag in Google Tag Manager.
Then click on Save all settings. You have successfully created a cookie for which we can obtain consent and transfer this information to the Google Tag Manager.
Step 3: Create tag
In Google Tag Manager, click Tag on the left and then click New.

An overlay opens, just click on the block symbol in the middle under Tag Configuration.
We call the tag Google Analytics. As shown in the video, we select Google Analytics: GA4 Configuration. Then we copy the Google Analytics Measurement ID (G-XXXXXXXX) into the Measurement ID field.
Step 4: Create trigger for tag
It's nearly done! We have created a tag in step 3, but have not yet saved it. In order for the tag to be executed, we need a trigger.
As shown in the video, click on the grey symbol in the middle and then click on the + symbol in the top right corner of the overlay.
In the overlay that now opens, click on the gray symbol in the middle again and then select the Trigger Type Custom Event.
In the Event Name field, enter the event name borlabsCookieOptInGoogleAnalytics that we have specified. If you opt-in to Borlabs Cookie, our Google Analytics cookie will trigger this event in Google Tag Manager and the trigger will, in turn, activate our tag.
Name the trigger Google Analytics Trigger and then click Save at the top.
Afterwards you are back in the overview of our Google Analytics tag. Click on Save in the upper right corner.
A possible use case: You want to send an event to Google Analytics when a user clicks a button.
Optional: Add additional Trigger
Add variable template
To lock a trigger on a Consent, we need a variable for the state of the Consent. To make creating this variable as easy as possible, we have published a template in the Google Tag Manager Template Gallery. This template needs to be imported in order to use it.
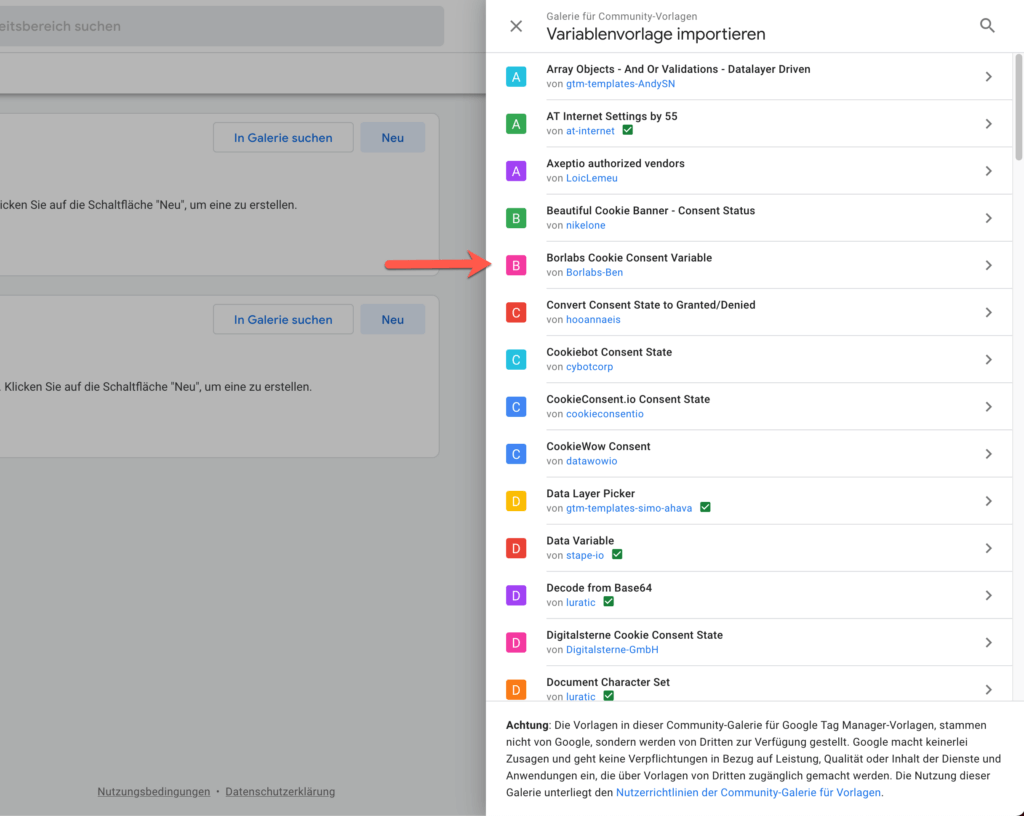
To do this, go to "Templates" and click on "Search Gallery".
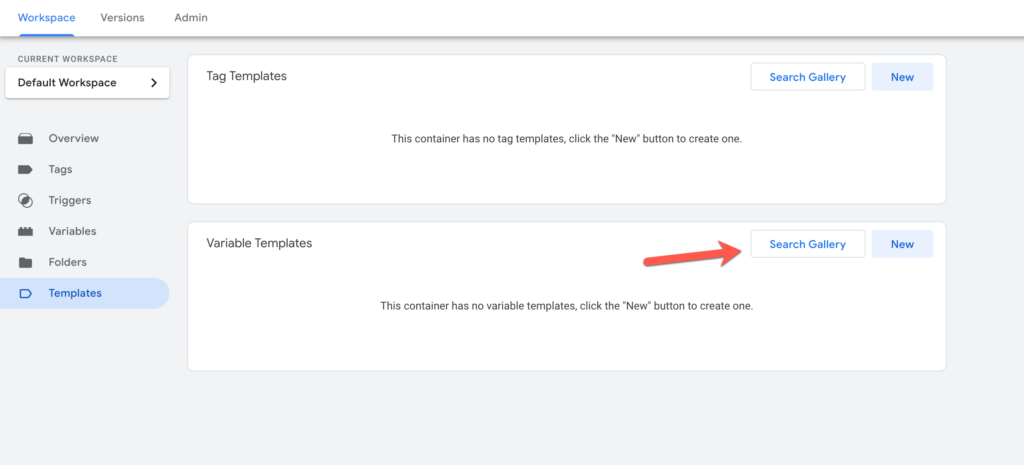
Now select the template "Borlabs Cookie Consent Variable".
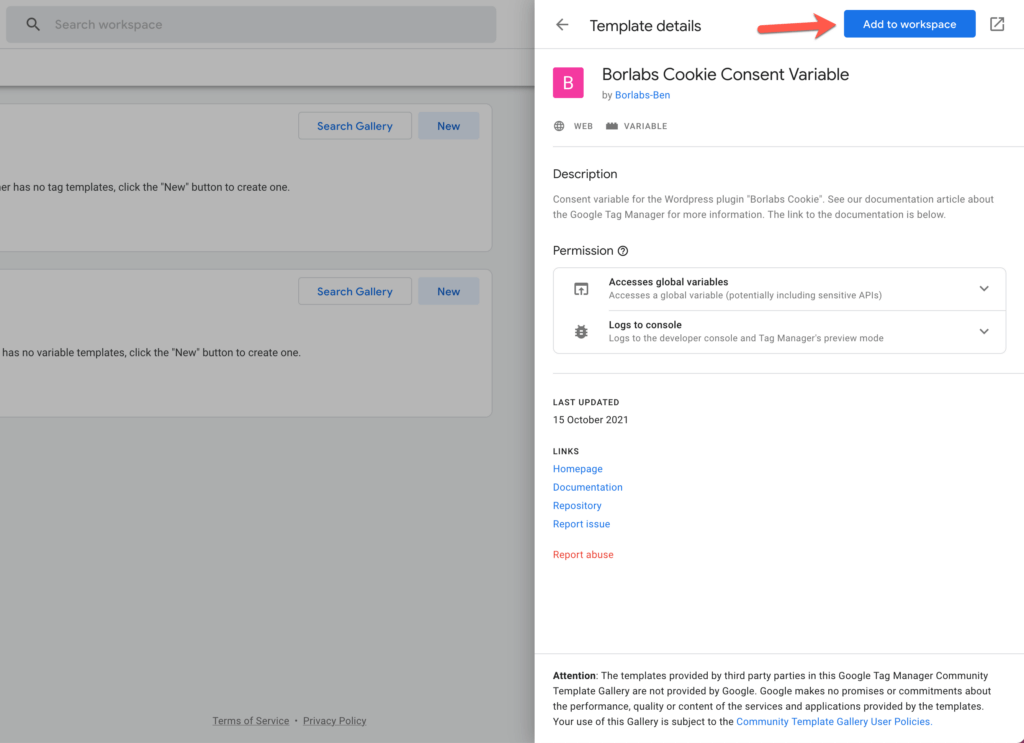
Now click on "Add to workspace" in the upper right corner.
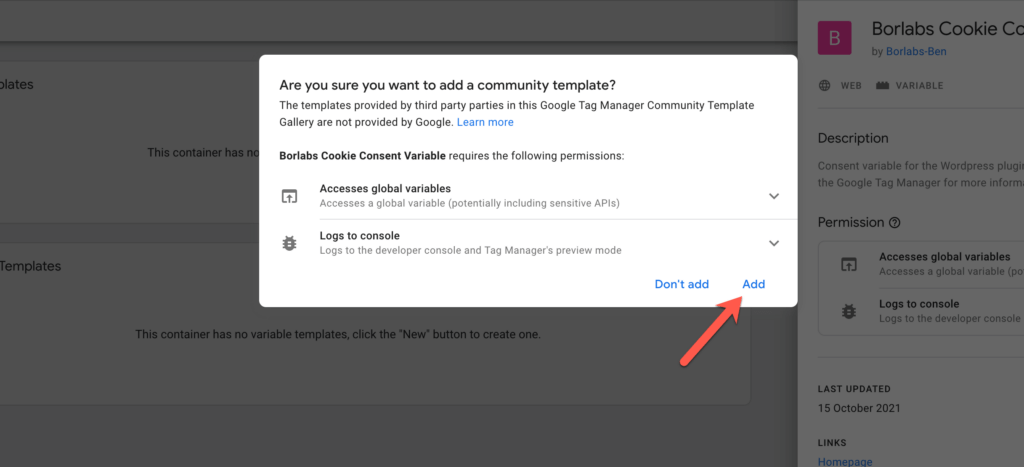
Now the Google Tag Manager asks again for the necessary permissions. Click on "Add" here.
Now the template should have been added.
Create variable to lock
To ensure that the trigger is only fired if consent has already been given to Google Analytics, we create a custom variable. To do this, in Google Tag Manager, go to Variables in the left navigation and click New on User-Defined Variables.
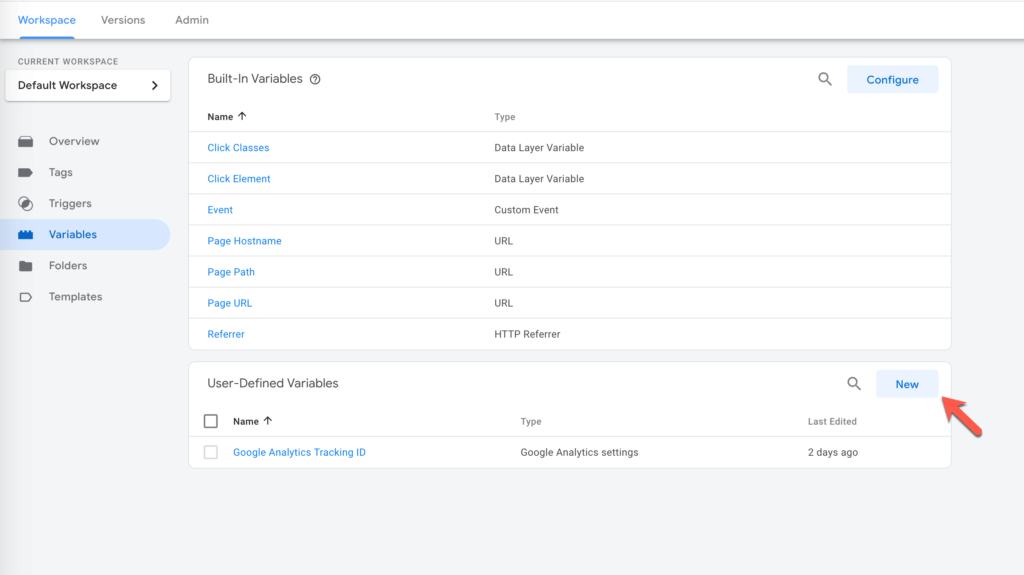
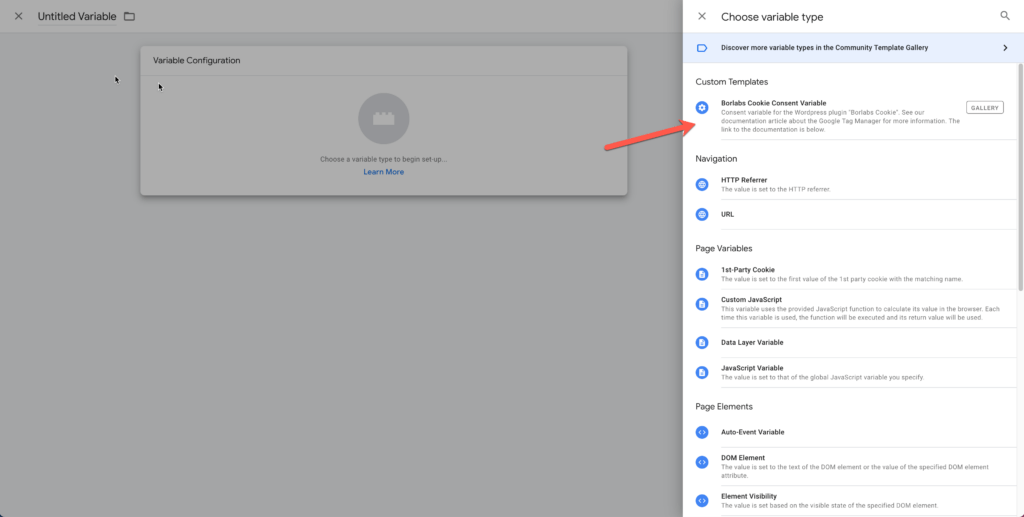
Now select the "Borlabs Cookie Consent Variable" template.
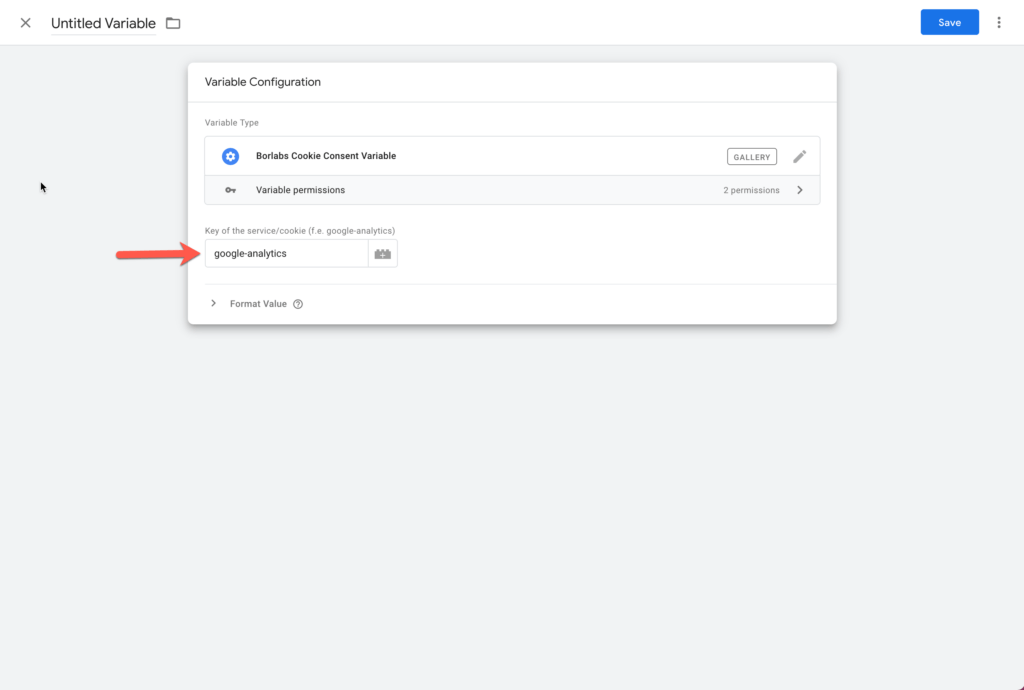
Now you have to enter the ID of the cookie in the Borlabs Cookie plugin into the input field "Key of the service/cookie". In our case, the ID is "google-analytics".
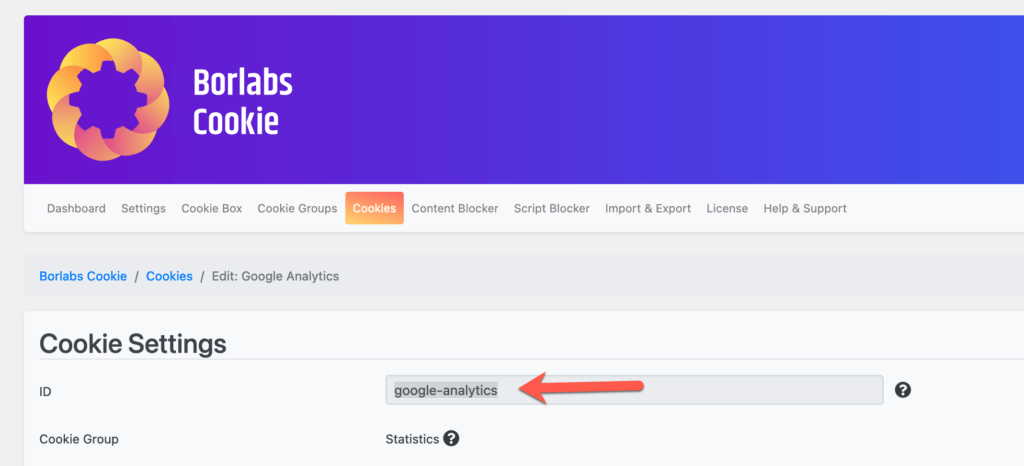
If you are unsure about the ID, you can look up the ID in the cookie settings in the Borlabs Cookie plugin and copy it.
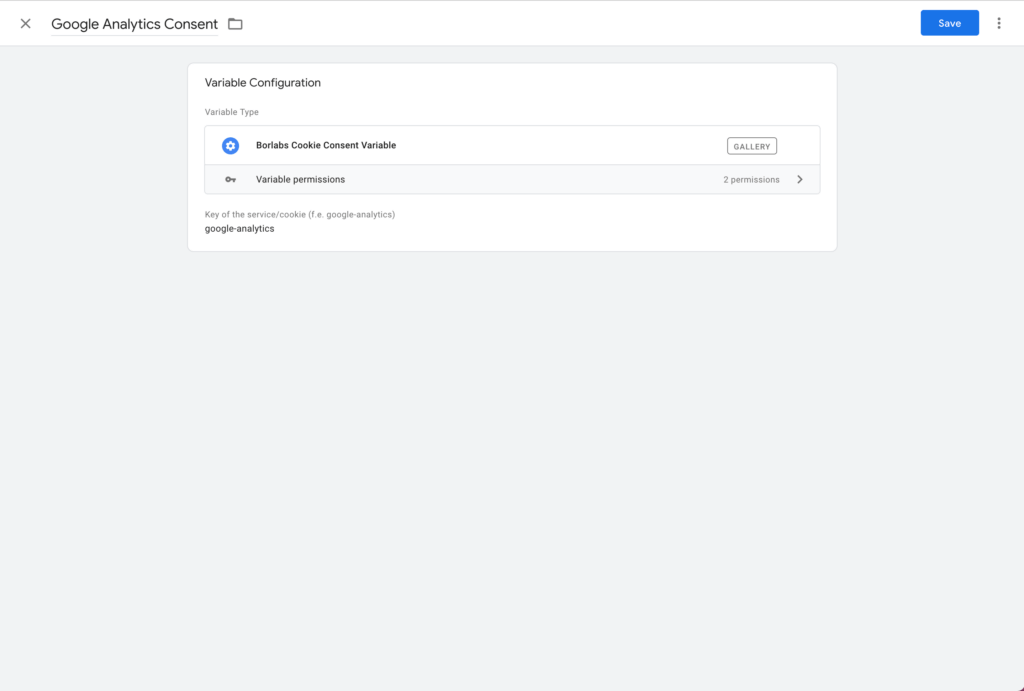
Now give the variable a meaningful name such as Google Analytics Consent in the header of the Create Variable area and then save.
Example 1: Create a tag to track click on specific links as an event.
As an example, we will create a trigger to send a click on a link a specific CSS class as an event to Google Analytics. To do this, we give the link a CSS class in WordPress. In this example, this class is sales-link.
The first thing to do is to create a trigger for it. To do this, go to Trigger in the left navigation of the Google Tag Manager and click on New.
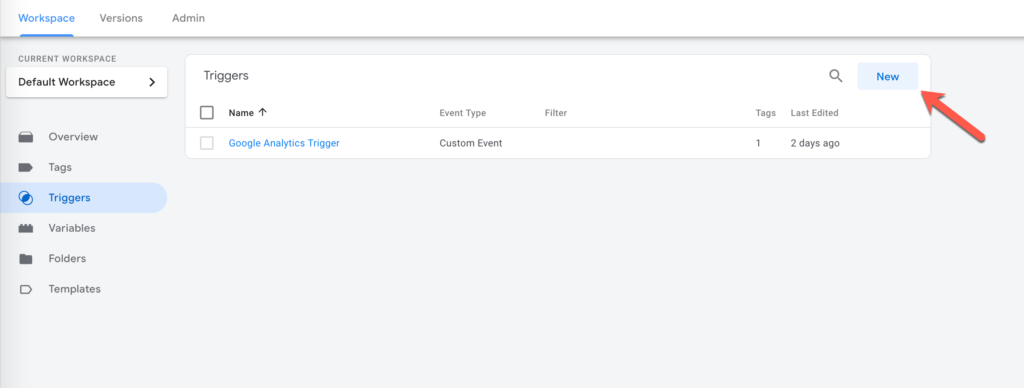
Click on the Trigger Configuration area and select Just Links under Choose trigger type.
Now select Some Links Clicks and then add the following conditions:
- Click Classes | contains | sales-link
- Google Analytics Consent | equals | true
If "Click Class" is not in the list, select "Select integrated variable" and then select "Click Class".
We will then name the trigger Click - Sales Link and press Save.
Finally, we have to create a tag for the Google Analytics event. To do this, go to Tags in the left navigation in the Google Tag Manager and click on New.
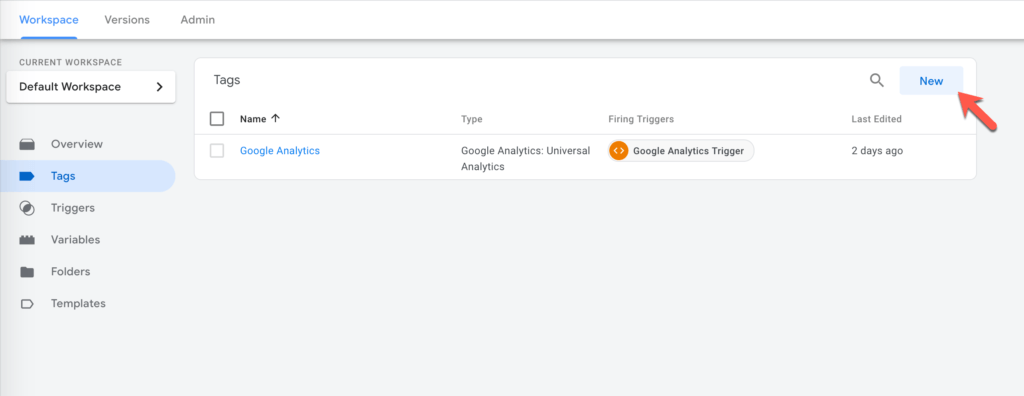
Click on the Tag Configuration section and select Google Analytics: GA4 Event under Select tag type.
Now select the Google Analytics tag for the configuration tag. For this example, we choose sales_link as the event name.
To connect the tag to the trigger you just created, click on the Trigger area and select the Click - Sales Link trigger under Select Trigger.
Then save the tag with any name (in our case, Google Analytics Sales Link Event).
Example 2: "Enhanced Ecommerce tracking" with the "Google Tag Manager Plugin".
Follow the guide below to configure the Google Tag Manager for "Enhanced Ecommerce Tracking":
https://gtm4wp.com/how-to-articles/how-to-setup-enhanced-ecommerce-tracking
When creating a trigger, note that the condition "Google Analytics Consent | is equal to | true" must be added.
Here is an example from the guide:
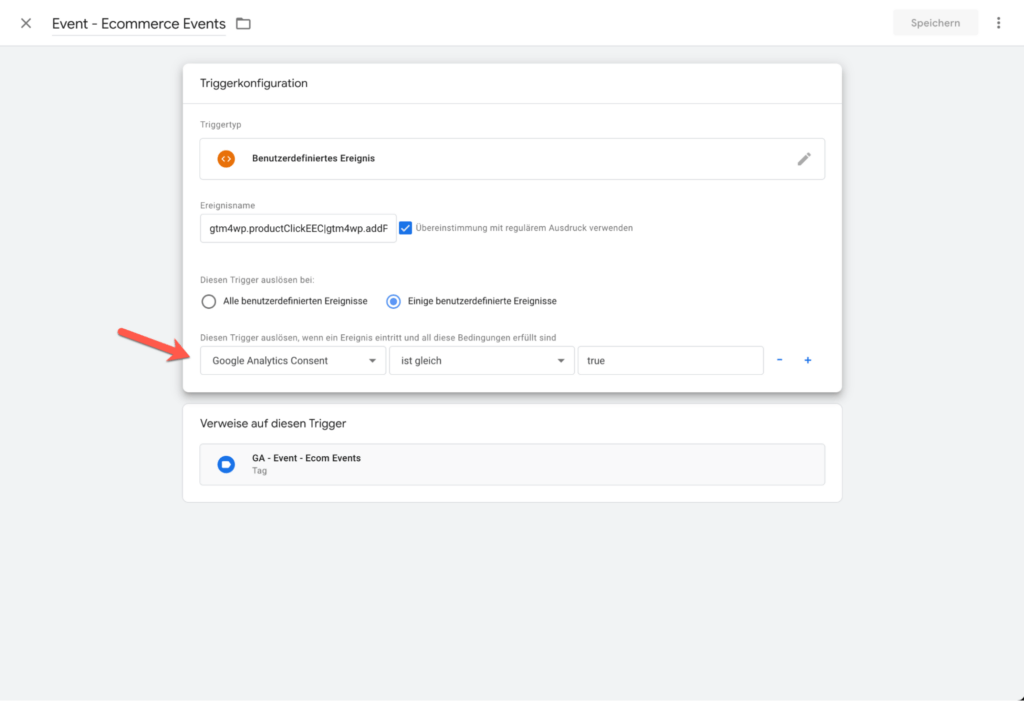
Finally, the changes have to be saved. To do this, press the Send button at the top right of the navigation bar.
Finished & last tips
When you have fully followed the steps, Borlabs Cookie will ask for permission to use Google Analytics and the Google Tag Manager will then run Google Analytics.
If you now want to create another tag e.g. for Facebook, repeat step 2 to step 4 and replace the event name borlabsCookieOptInGoogleAnalytics with e.g. borlabsCookieOptInFacebook.
Bonus: Testing
If you want to make sure that your setup worked, you can use the Google Tag Manager to test your trigger and the execution of the tag. To do this, click Preview at the top of the Google Tag Manager.

Then you can open your website in another tab (not incognito mode!) and see the Google Tag Manager console as shown in the video.
Tip
If you make changes in Google Tag Manager and want to test them first, click Update to apply your changes to preview mode.
