Many website operators use Google AdSense ads. The GDPR also applies here: The visitor must agree in advance to the use of AdSense ads.
Our plugin Borlabs Cookie offers a solution for this: Correctly set up, Borlabs Cookie sets the corresponding Google AdSense cookies only after the visitor's consent in the Cookie Box.
In this guide we would like to show you exactly how the integration of Google AdSense works, what you have to pay attention to and with which plugin you can automatically place ads at different places on your website.
Integrate Google AdSense in Borlabs Cookie
Die Einbindung von Google AdSense funktioniert mit unserem Borlabs Cookie Plugin ganz einfach und unkompliziert. Hierzu musst du in den Einstellungen nur einen entsprechendes Cookie und deine Google AdSense Publisher-ID hinterlegen.
The integration of Google AdSense with our Borlabs Cookie Plugin is easy. All you need to do is to create the necessary Cookie and enter your Google AdSense Publisher-ID in the settings.
Step 1: Create Cookie
To use Google AdSense with our Borlabs Cookie Plugin, you have to create an AdSense Cookie and enter your Publisher-ID from Google AdSense. First, go to Cookies and create a new Cookie.

To do this, click on the Add new button under the Marketing item.

Now select Google AdSense under Service and click on Next.

Afterwards you have to enter your Publisher ID on the following page under Additional settings and click on Save all settings.

You'll find your Publisher ID at the top of the browser bar when you sign in to Google AdSense or directly within your account settings.
Browser:

Account settings:
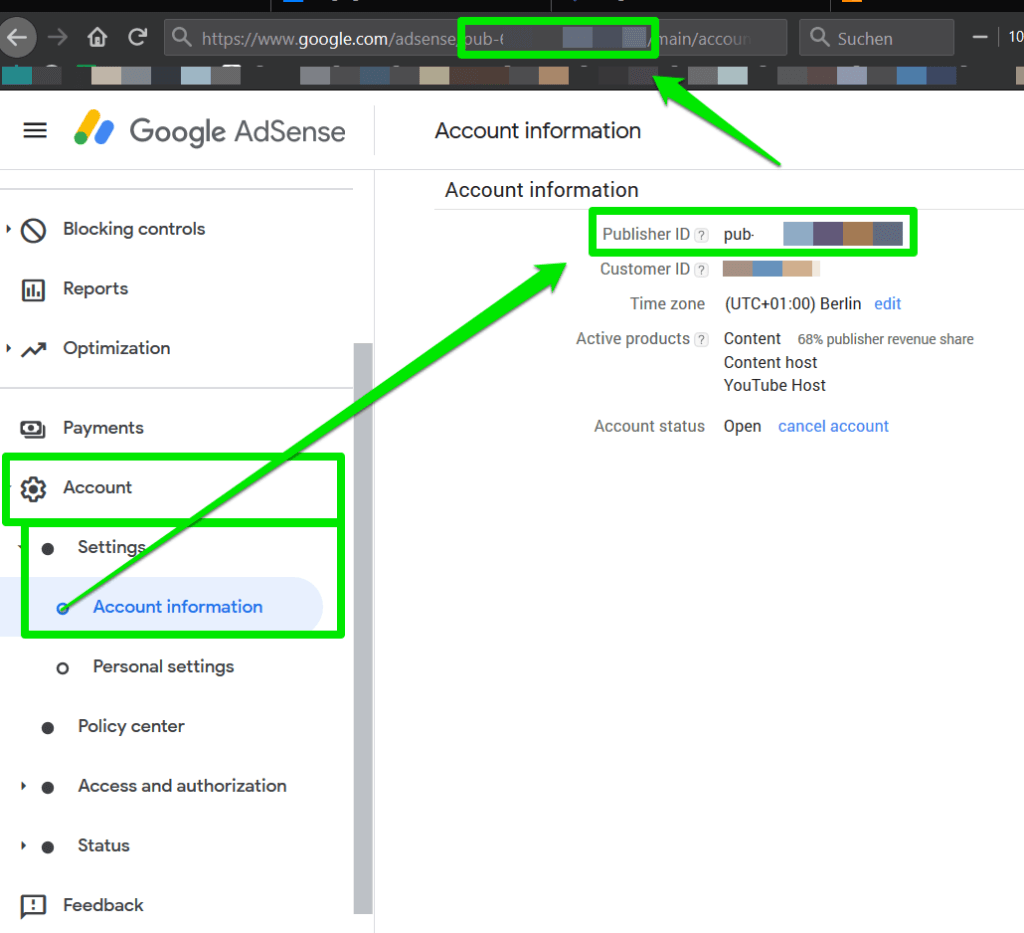
In this step, you have created the Cookie for Google AdSense and can control it later via the Cookie Box.
Step 2: Place AdSense banner
Once you have stored your Google AdSense Publisher ID, you can simply use the prefabricated code for the placement, which we already provide on the cookie page. You can find this code right next to the Additional settings item under Tips. This is where you have stored your Publisher-ID.

You will also find the item Cookie settings above. There you can find a shortcode, which you can also embed anywhere on your website and in which you can directly store the AdSense script for the ad. With this shortcode, the ads will only be displayed once a user has agreed to the cookie.
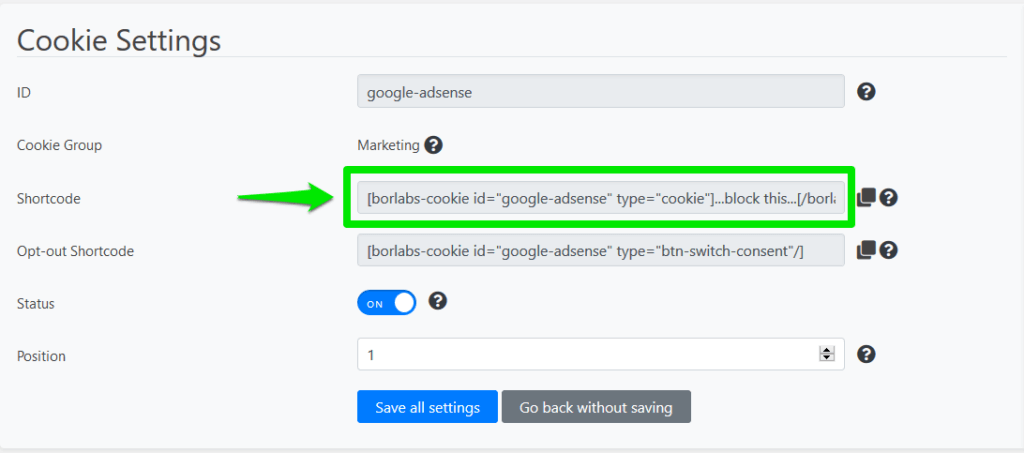
Example 1: Integration within a page/post.
To be able to embed Google AdSense into your page or post via the above-mentioned shortcode, you have to copy it. You can do this with a click on the Copy symbol.

Afterwards, open a new or existing page or post and insert this shortcode at any position. You will then need to replace the fill characters …block this… with your AdSense code for the ad you wish to include in that position.
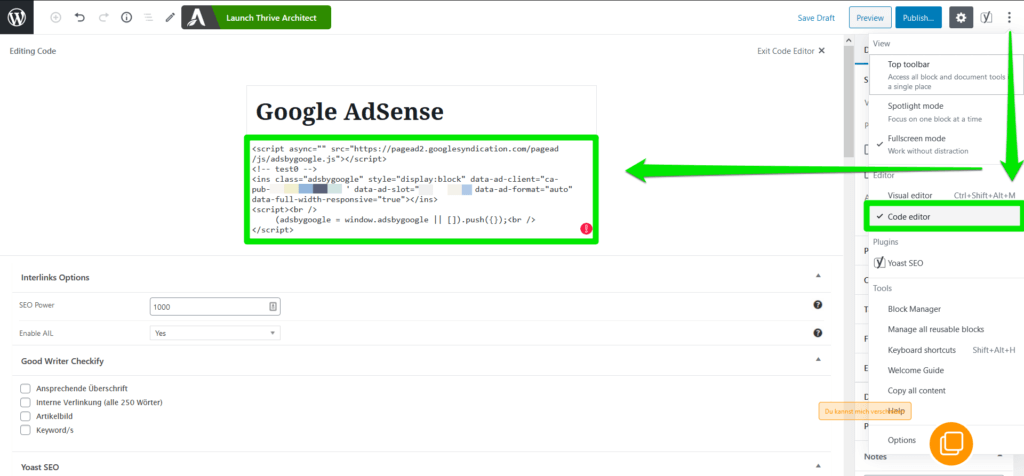
Example 2: Integration within the sidebar via widget
If you want to integrate a Google AdSense ad into your sidebar using the above method and the shortcode, simply add the text widget to your sidebar.
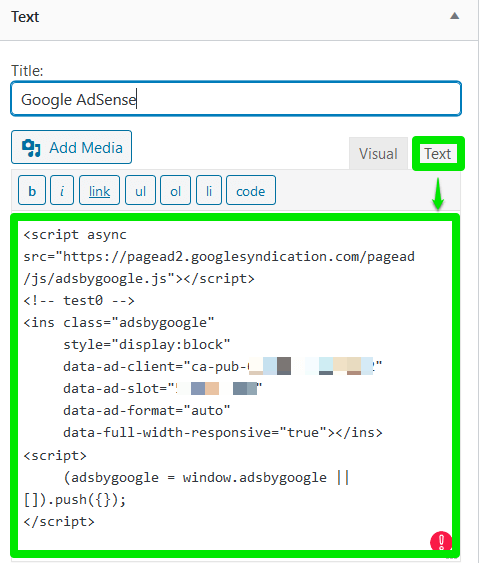
Output Google AdSense via "Banner"- Plugin
Many website operators use additional plugins to place their ads or banners. This has the advantage that many of these plugins already have ready-made widgets and also offer the possibility to display ads at any position, fully automatically and within a page or a post.
Advanced Ads belongs to such an extensive and helpful plugin. With this plugin, you can create and manage ad spaces.
How you can use Advanced Ads in conjunction with our Borlabs cookie is explained below.
The error Uncaught M {message: "adsbygoogle.push() … can occur. This is because the Google AdSense library is loaded twice.

Step 1: Connect Advanced Ads with Google AdSense
In the settings of Advanced Ads, under the item AdSense you have the possibility to directly connect your Google AdSense account for the spending of ads. You also need to do this if you want to have AdSense ads automatically delivered via the Advanced Ads plugin and if you use our Borlabs Cookie plugin.

Advanced Ads also gives you the option of having your ads displayed in a privacy-compliant manner. To do so, you must go to the menu item Privacy.
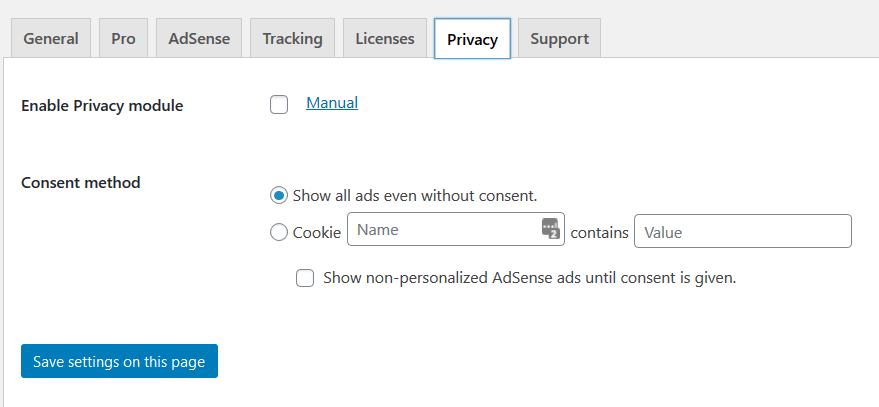
Here you have to check the box Enable privacy module. To ensure that the Google AdSense ads are only displayed when a user gives consent via the Cookie Box of Borlabs Cookie, you must also enter the cookie name and its value under Consent method.
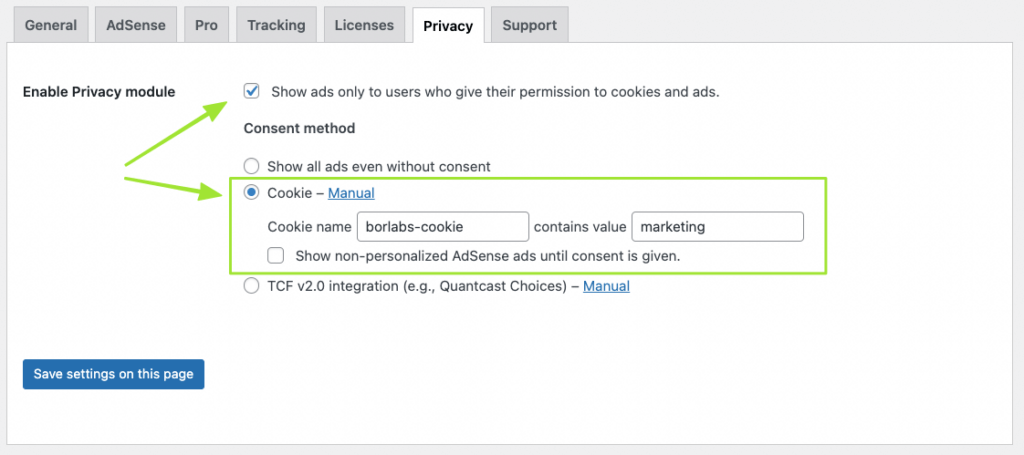
Then click on the button Save settings on this page.
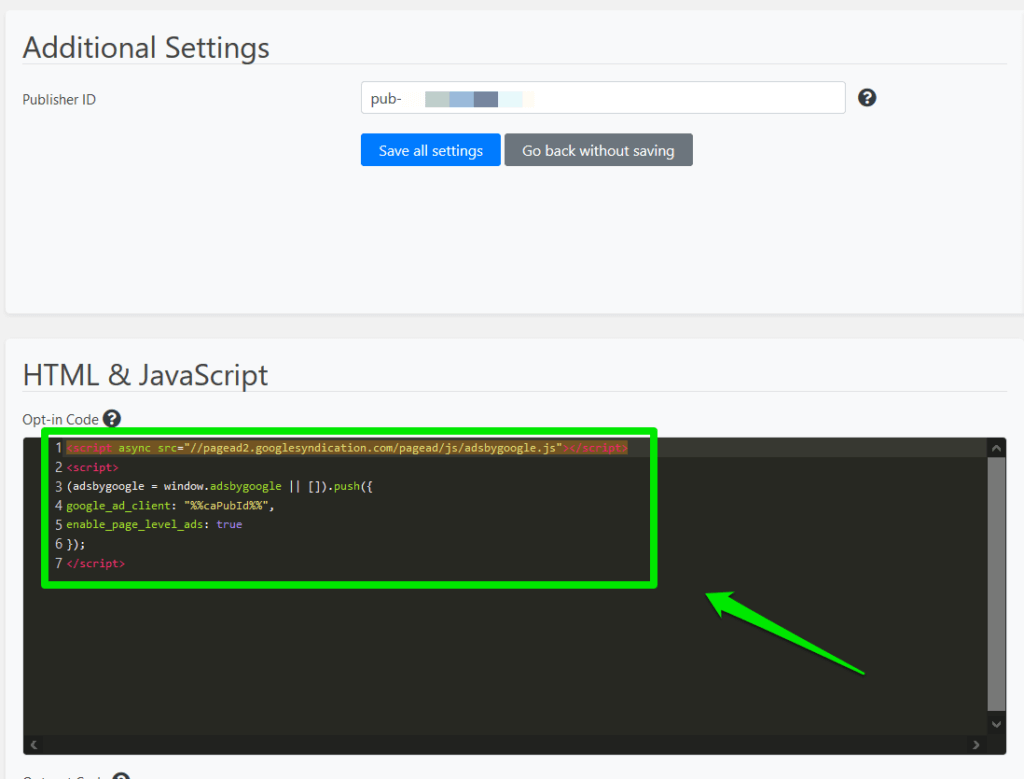
Now you must remove the opt-in code in Borlabs Cookie > Settings > Marketing > Google AdSense (where you have stored your Publisher ID), under the HTML & JavaScript section.
Display Google Adsense ads: pages, posts, widget and template file (php)
Um Google AdSense Anzeigen innerhalb von Seiten, Beiträgen, in der Sidebar ausgeben lassen zu können oder in eine .php-Datei zu integrieren, stehen dir mit dem Advanced Ads Plugin zahlreiche Möglichkeiten zur Verfügung. Die wichtigsten Funktionen aus dem Plugin möchten wir dir nachfolgend kurz vorstellen.
In order to be able to display Google AdSense ads within pages, articles, in the sidebar or to integrate them into a .php file, the Advanced Ads Plugin provides you with numerous options. These are the most important functions of the plugin:
Ads in pages and posts
In order to have Google AdSense display ads in pages or posts, you have to go to the Ads menu in the Advanced Ads settings. Then click on the New ad button here.
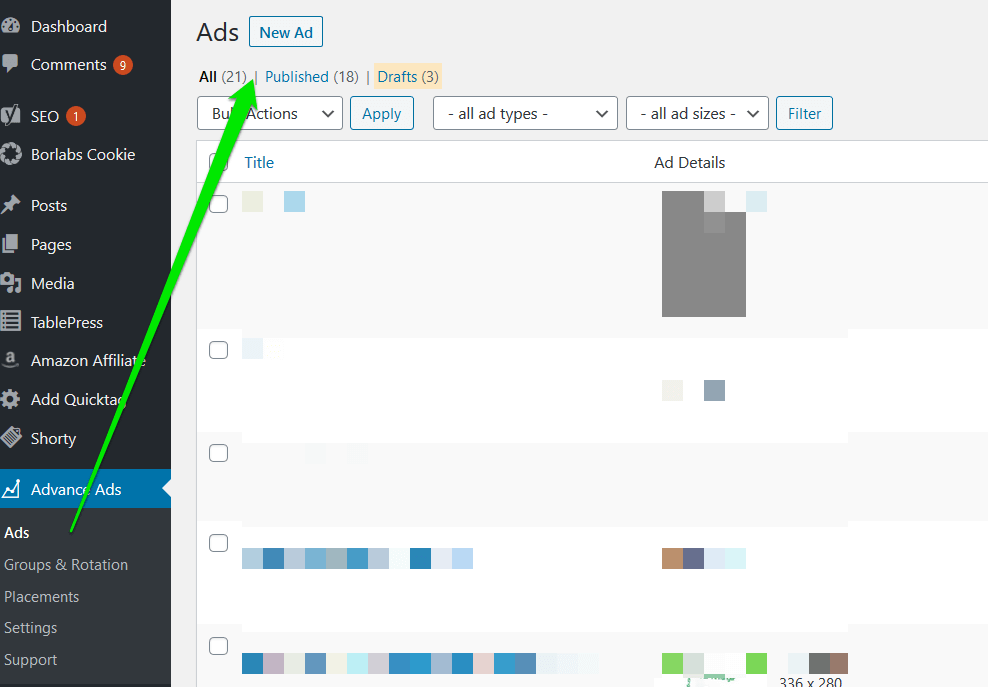
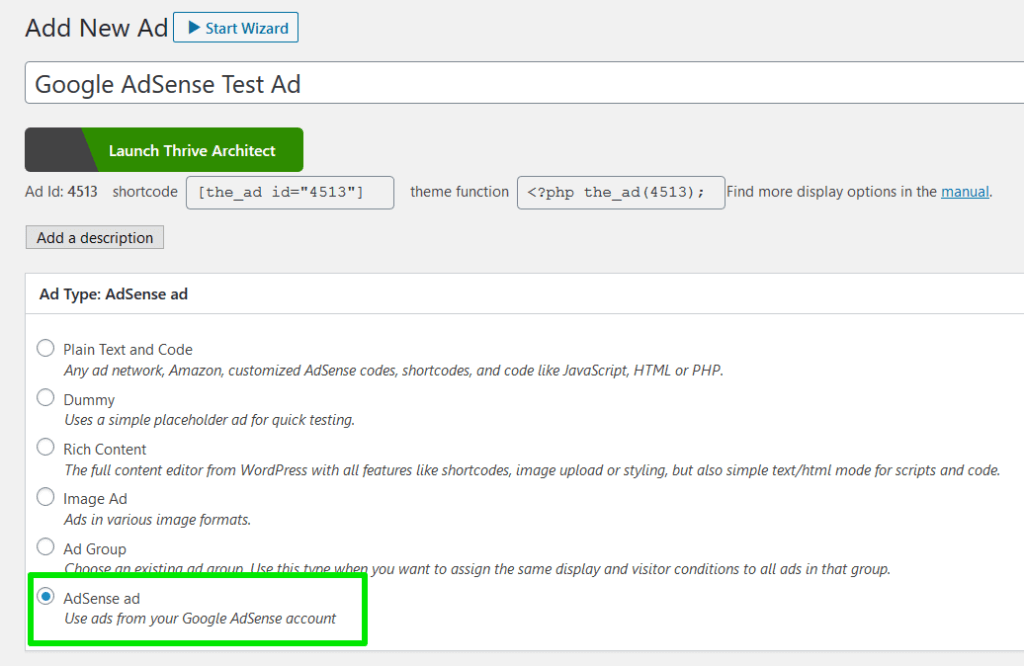
Now you get to the menu where you can store your ad. You can assign a title/name to your ad and select the type of ad.
If you have connected the Advanced Ads Plugin directly to your Google AdSense account as shown above, select the AdSense Ad item and click Next.
Store AdSense code
In the following, you will now see the so-called Ad Parameters. Here you have now two possibilities: You can enter your Ad Slot ID here (provided the connection to Google AdSense is active) and you can add new AdSense code simply by copy & paste.
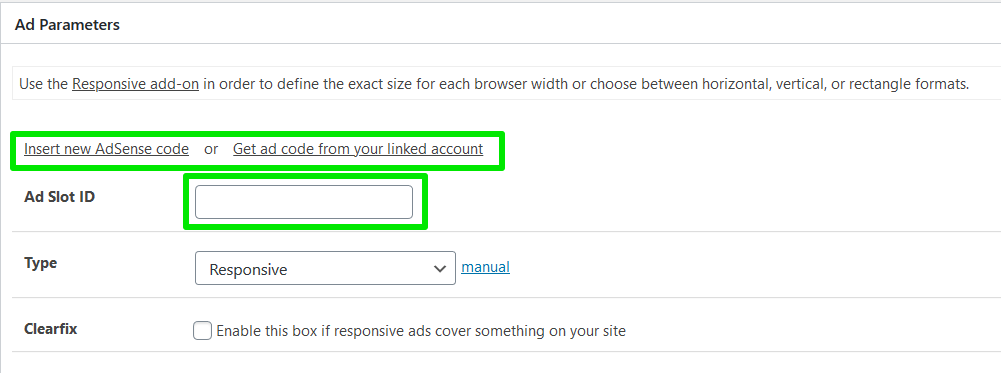
The Type is set to Responsive by default. Here you do not have to change anything for the output of the display at first.
Layout / Output and conditions
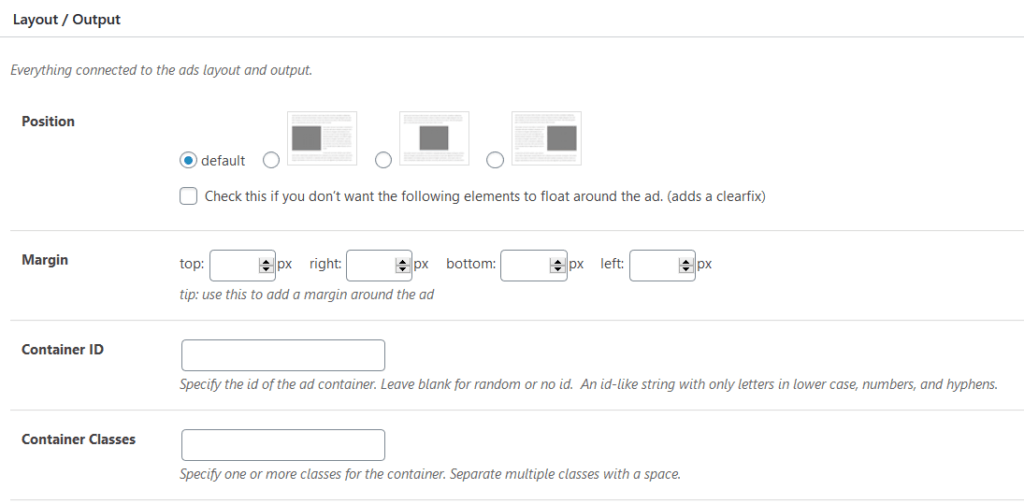
In the next step you get to the menu Layout / Output, where you can define the position of the output, the spacing or even your own CSS classes.
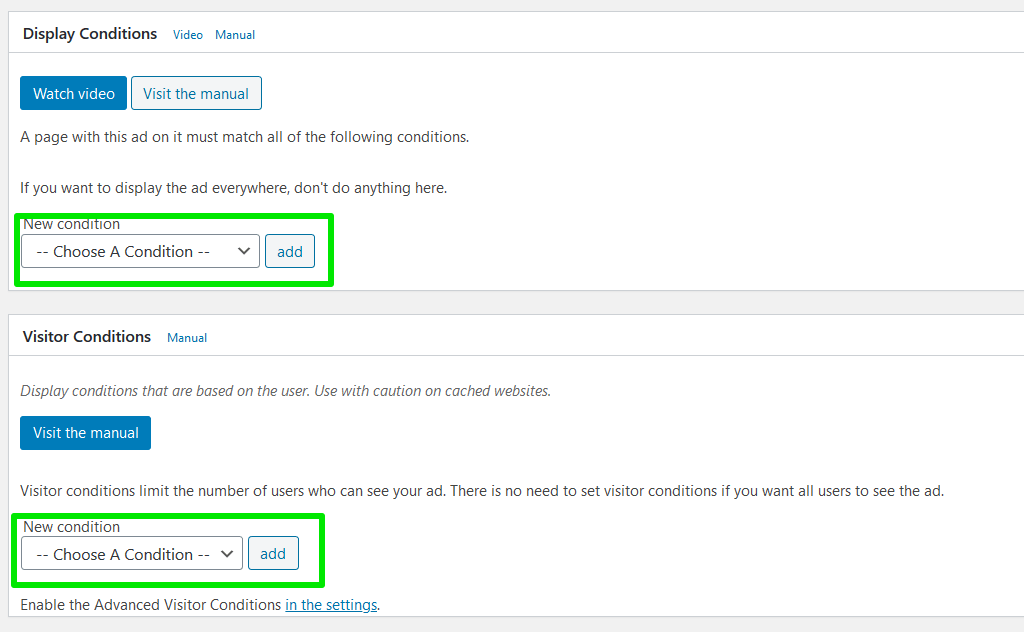
Do you want Google AdSense to display ads only under certain conditions? For example only within a certain category or if the visitor came to your site from a certain referrer URL?
Then you can set this under the items Display Conditions and Visitor Conditions.
Once you have saved your ad, a shortcode is available directly under the title you entered at the beginning, which you can place anywhere on your website.

Placements
With the Advanced Ads Plugin you can also easily place Google AdSense ads in different places (e.g. in the content, after the content, before the content).
To do this, click on the menu item Placements within the plugin and you will get to the menu for ad placement.
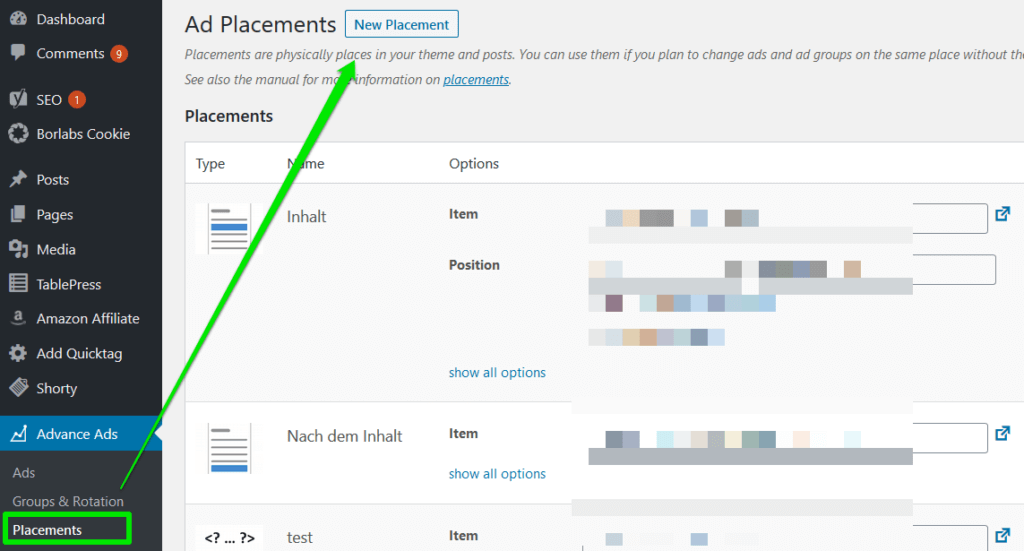
Now click on the button New Placement to select a placement for your previously created Google AdSense ad.
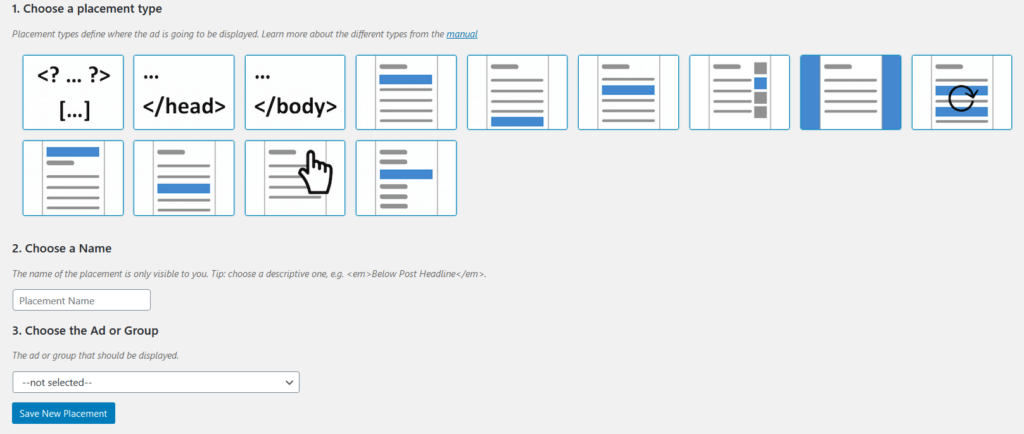
Under point 1 you can already find a variety of placements in the free version of the plugin. Here you can see the manual placement via shortcode (or function), the placement in the header code and footer code and also the placements for before the content, after the content, in the content and as a sidebar widget.
Under point 2 you can choose a name for the placement and under point 3 you can choose your previously created advertisement for the placement. When ready click on the button Save placement. The advertisement will be displayed automatically at the position you selected.
Display via widget in the sidebar
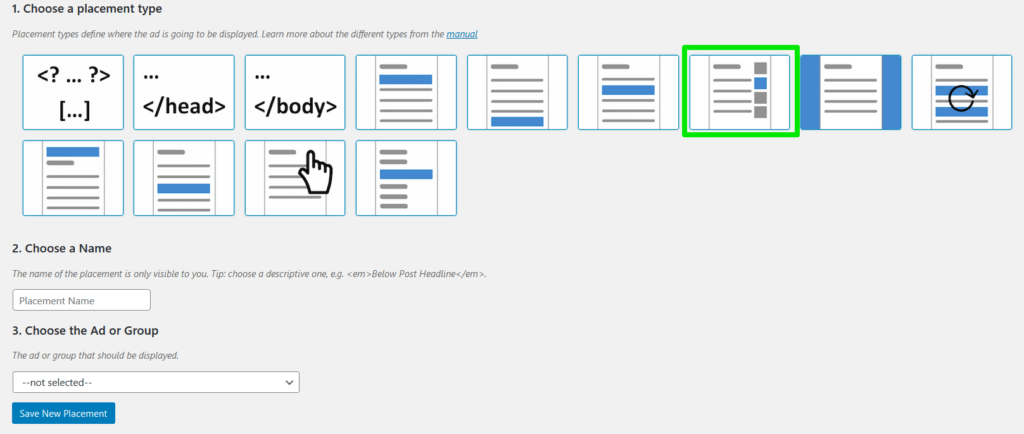
If you want to display your Google AdSense ads within the sidebar, proceed exactly as described above under Ads in pages and posts. Only, in the last step Placements, select the placement Sidebar.
Use Widget
Inside the widgets you will find the widget Advanced Ads, which you simply have to drag into the sidebar to select your previously created ad from the drop-down menu. There you can also assign a title.
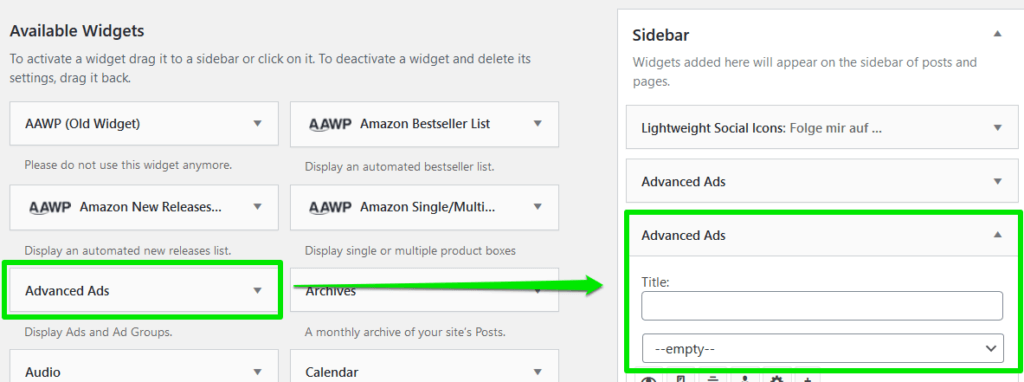
Function within a template file
If you want to place an ad or its code for output directly within a .php file / template file, this is also easily possible with the Advanced Ads Plugin.
We have already shown you how to create an ad in the section Ads in pages and articles above. Therefore we will now jump directly to the point Placements again.
If you want to include an ad in a .php file / template file or the function for output, you have to select Shortcode / Function in the menu Ad Placements.
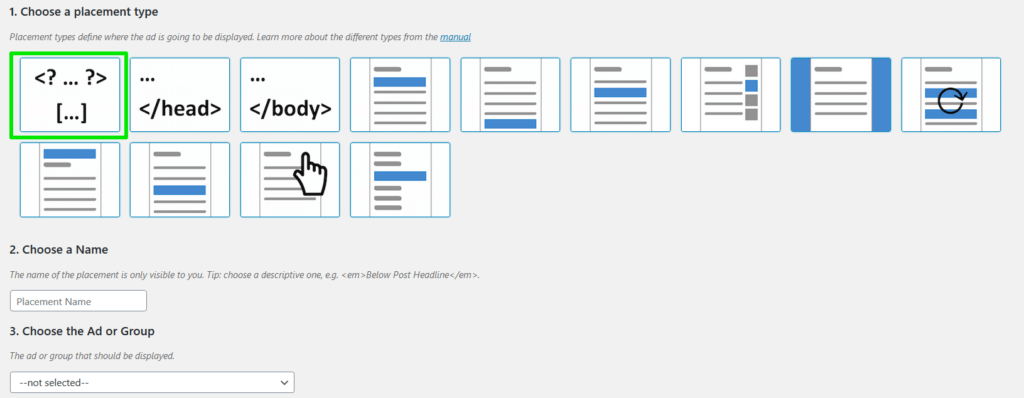
If you have assigned a name and selected the ad and clicked the button Save new placement, you will be taken to the overview of all created placements. There you will also find the placement you just created.
You can use this code to integrate your previously created ad into your template file (PHP).

Conclusion
We hope this little guide to the integration of Google AdSense has already helped you. Should you still have questions, please check first whether you have considered all the points described here. Otherwise, we are of course available for you in our Support.