In the following document, we will show you how you can integrate Calendly into your website using our Borlabs Cookie plugin.
Step 1: Create Content Blocker
In the first step, create a Content Blocker. To do this, click on the "Add new" button in the "Content Blocker" menu.

1. Content Blocker Settings
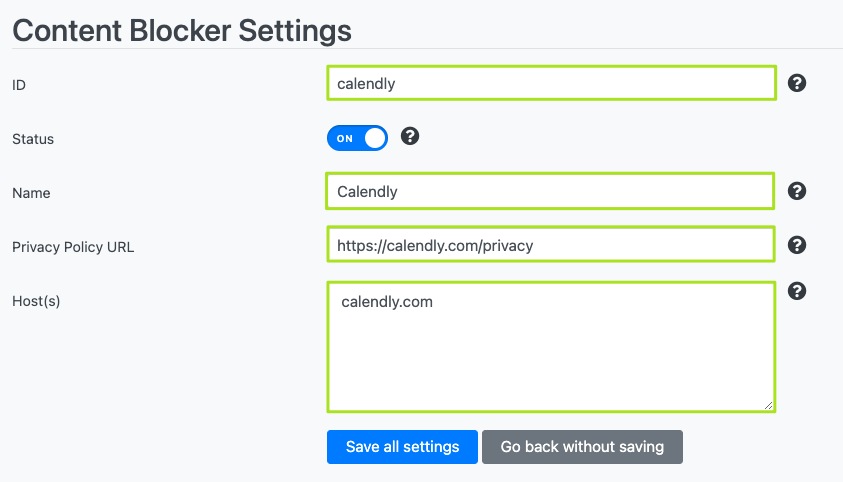
In the Content Blocker settings, you must now enter an ID, a name, the URL for the privacy policy, and a host. In addition, set the status of the Content Blocker to ON.

ID: calendly
Name: Calendly
Privacy Policy URL: https://calendly.com/privacy
Host(s): calendly.com
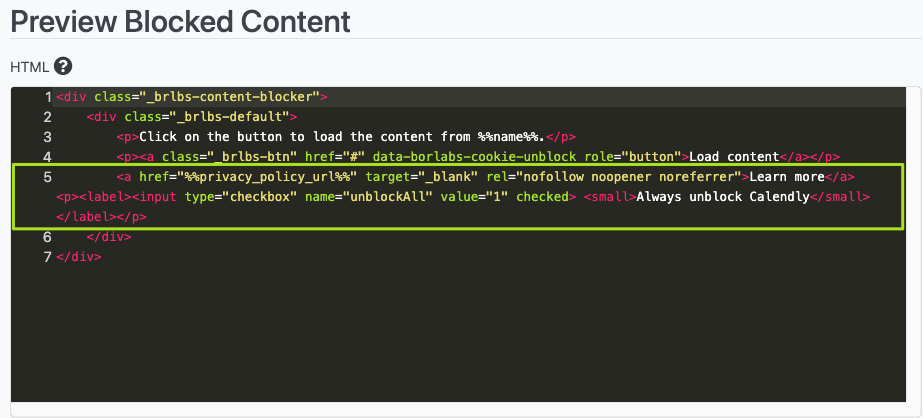
Under "Preview Blocked Content" → "HTML", we recommend that you add the following to the existing content:
<a href="%%privacy_policy_url%%" target="_blank" rel="nofollow noopener noreferrer">Learn more</a>
<p><label><input type="checkbox" name="unblockAll" value="1" checked=""><small>Always unblock Calendly</small></label></p>
Then click on the button "Save all settings".
2. Copy Shortcode
Now copy the following shortcode and call up the page where you want to insert Calendly or where you have already inserted it.

Step 2 - Calendly Embedded Code
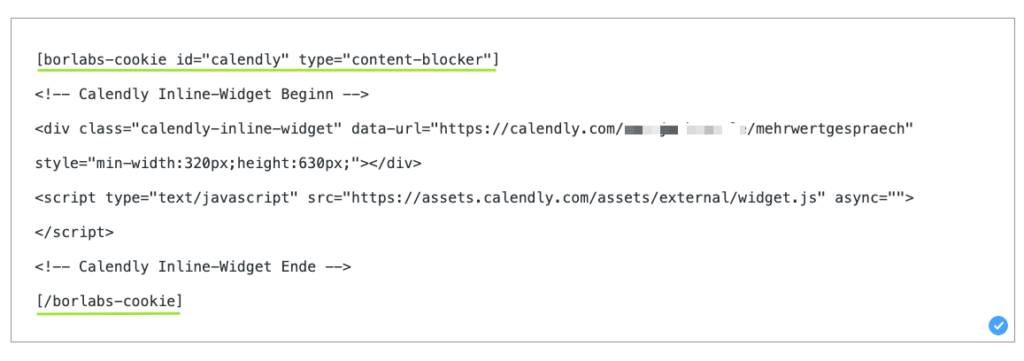
Now paste the previously copied shortcode for the Content Blocker here. The shortcode must enclose the Calendly snippet.
Important: Set your editor to "HTML" beforehand and then insert both the shortcode and the Calendly Embedded.

The result should now look like this:
